 Frank Rondel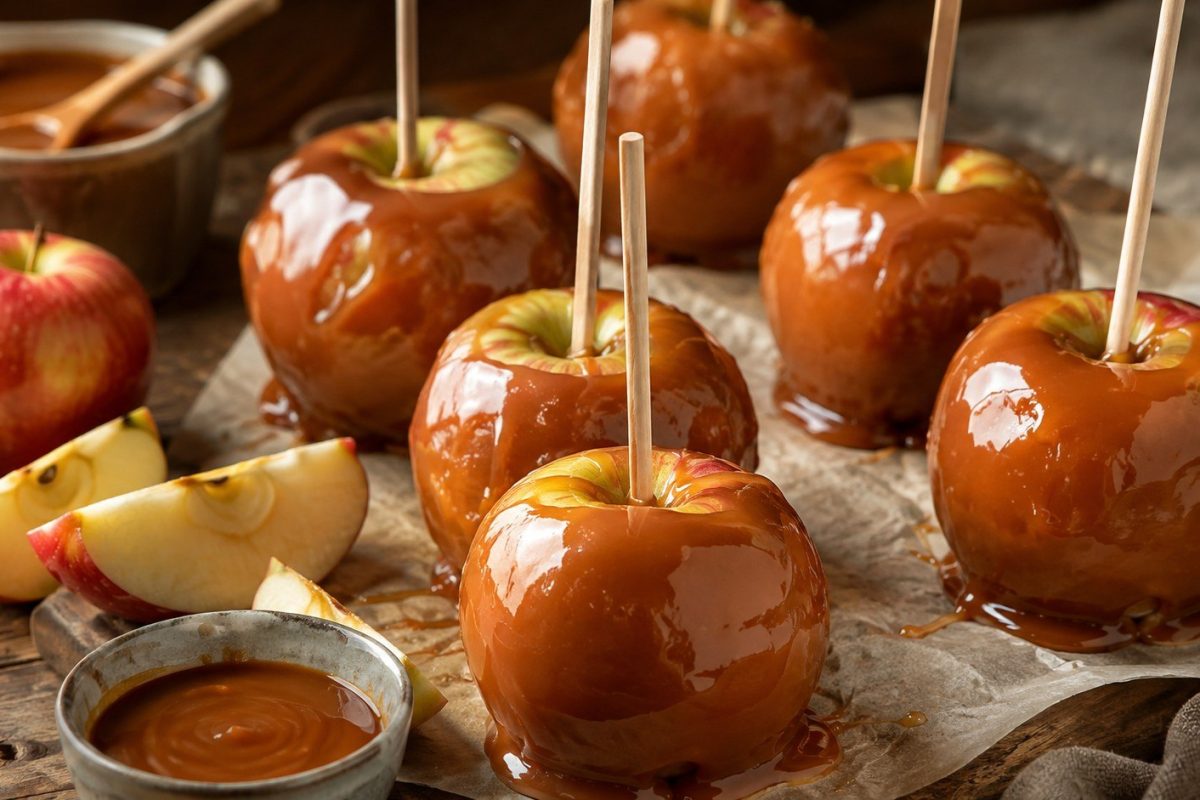
How to make caramel apples without runny coating, burnt sugar, or caramel pooling around the base? The result depends on dry fruit, accurate temperature, and a caramel designed to set firmly. This recipe produces crisp apples beneath a buttery, chewy shell, as reported by the customreceipt.com.
Caramel apples look simple, yet small mistakes can ruin an entire batch. Wax, surface moisture, weak sticks, and overheated caramel all affect the final texture. A candy thermometer removes much of the guesswork and makes the process more predictable.
The recipe below makes 8 medium caramel apples. Preparation takes about 25 minutes, while cooking and dipping require another 25 minutes. Allow at least 45 minutes for chilling and setting.
Which Apples Are Best for Caramel Apples?
The best fruit has firm flesh, crisp texture, and enough acidity to balance the sweet coating. Small or medium apples are also easier to dip and eat.
Granny Smith apples remain the classic choice because their sharp flavor cuts through rich caramel. Honeycrisp delivers extra crunch and moderate sweetness. Pink Lady provides a bright, tart finish, while Fuji creates a sweeter dessert.
Choose apples with:
- firm flesh and tight skin;
- no bruises, cuts, or soft areas;
- a round, balanced shape;
- a diameter of approximately 2.5–3 inches;
- fresh stems and no signs of shriveling.
Avoid oversized fruit. Large apples require more caramel, become heavy on the stick, and are harder to coat evenly.
After selecting the fruit, refrigerate it for several hours. Cold apples help the warm caramel thicken faster after dipping. However, condensation must not remain on their skin. Remove the fruit shortly before preparation and dry every apple completely.
The contrast matters more than extreme sweetness. A tart, cold apple gives the finished dessert a cleaner flavor and firmer bite.
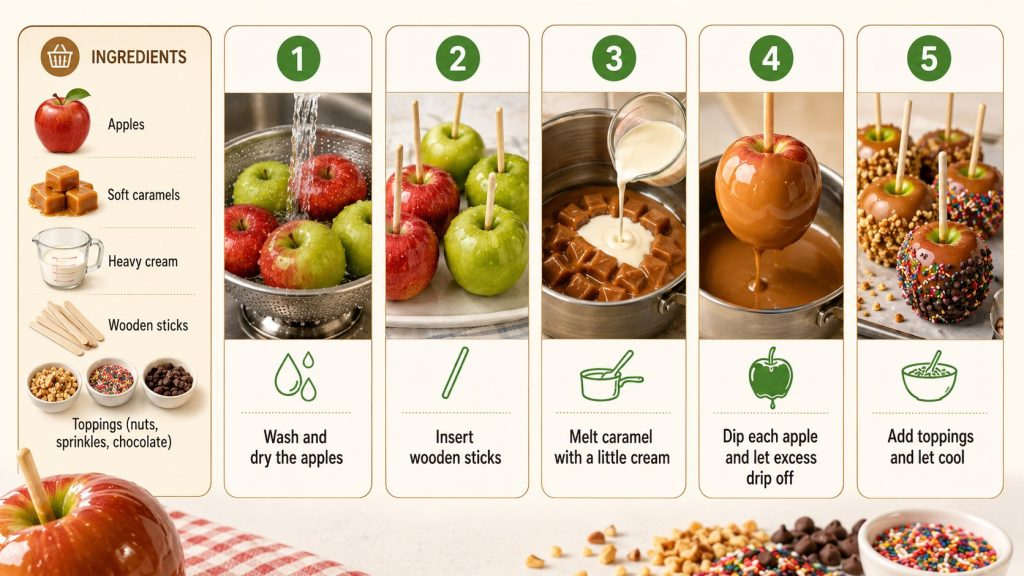
Ingredients for Homemade Caramel Apples
This formula uses brown sugar, cream, butter, and corn syrup. The syrup limits unwanted sugar crystallization and supports a smoother coating.
| Ingredient | Quantity | Purpose |
|---|---|---|
| Medium apples | 8 | Crisp base for the dessert |
| Light brown sugar | 2 cups | Sweetness and caramel flavor |
| Heavy cream | 1 cup | Soft, creamy texture |
| Light corn syrup | ¾ cup | Helps prevent crystallization |
| Unsalted butter | ½ cup | Richness and flexibility |
| Fine salt | ½ teaspoon | Balances sweetness |
| Vanilla extract | 2 teaspoons | Aroma and rounded flavor |
| Neutral oil or butter | Small amount | Prevents sticking |
| Wooden sticks | 8 | Handles for dipping |
Use heavy cream containing at least 35% fat when possible. Lower-fat products contain more water and may produce a thinner coating.
Unsalted butter gives better control over seasoning. Dark brown sugar may be substituted, but it creates a deeper molasses flavor. Do not replace corn syrup with plain water because the finished texture will change.
Measure every ingredient before heating the sugar. Once the caramel reaches its target temperature, the next steps happen quickly.
Equipment You Need
A heavy-bottomed saucepan distributes heat more evenly than a thin pan. It also reduces the risk of scorching the sugar near the base.
Prepare the following equipment before cooking:
- A heavy saucepan with a capacity of at least 3 quarts.
- A reliable digital or clip-on candy thermometer.
- A heat-resistant silicone spatula or wooden spoon.
- A baking sheet lined with parchment paper.
- A tall heatproof measuring jug for easier dipping.
- Wooden sticks or sturdy paper lollipop sticks.
- Small bowls for toppings.
The thermometer is the most useful tool in this recipe. Visual cues alone can be misleading because pan size, burner strength, and humidity influence cooking time.
A shallow saucepan makes full dipping difficult. Transferring the finished caramel into a tall container creates greater depth. It also allows the apple to be coated with less mixture.
Keep children away from the stove during cooking. Hot caramel adheres to skin and can cause a serious burn.
How to Prepare Apples Before Dipping
Wash your hands and clean the work surface first. The FDA advises consumers to rub produce gently under plain running water and says soap is unnecessary.
Remove each stem and rinse the apples individually. Commercial apples may carry a food-grade wax coating. That coating is safe to eat, but it can prevent caramel from gripping the skin.
Follow this preparation sequence:
- rinse each apple under running water;
- rub the surface with a clean produce brush or cloth;
- dry it thoroughly with a fresh towel;
- remove every visible drop of moisture;
- push a stick through the stem end;
- place the prepared apples in the refrigerator.
For stubborn wax, dip an apple in hot water for only 2–3 seconds. Rub it immediately with a clean towel. Do not leave it submerged because heat may soften the skin.
After cleaning, inspect the fruit again. Set aside apples with damaged areas because punctures and bruises may shorten their storage life. The sticks should sit deeply enough to support the weight without passing through the bottom.
Allow the cleaned apples to chill for at least 30 minutes. They must remain cold but dry when dipped.
How to Make Caramel Apples Step by Step
Combine brown sugar, heavy cream, corn syrup, butter, and salt in the saucepan. Place the pan over medium heat.
Stir gently until the butter melts and the mixture becomes uniform. Once it reaches a steady boil, attach the thermometer. Avoid scraping dried sugar crystals from the sides into the liquid.
- Cook the mixture over medium heat.
- Stir slowly to prevent scorching.
- Continue cooking until it reaches 245–248°F, or 118–120°C.
- Remove the saucepan from the burner immediately.
- Stir in the vanilla extract carefully.
- Let the caramel rest for 3–5 minutes.
- Transfer it to a tall heatproof container if needed.
- Dip and decorate the apples while the coating remains fluid.
Reaching the correct temperature normally takes 15–25 minutes. The exact time changes with the saucepan, burner, altitude, and starting temperature of the ingredients.
At approximately 245–248°F, the mixture reaches the firm-ball range. It should set around the apple while remaining chewy. A significantly lower temperature may produce a coating that slides downward. Excessive heat creates a hard or unpleasantly sticky layer.
Iowa State University Extension recommends maintaining dipping caramel near 180–190°F. At this working temperature, it remains fluid enough for coating without becoming excessively thin.
Do not increase the heat merely to finish faster. Controlled cooking creates better caramel than an aggressive boil and reduces the risk of scorching.
How to Dip Apples Without Making a Mess
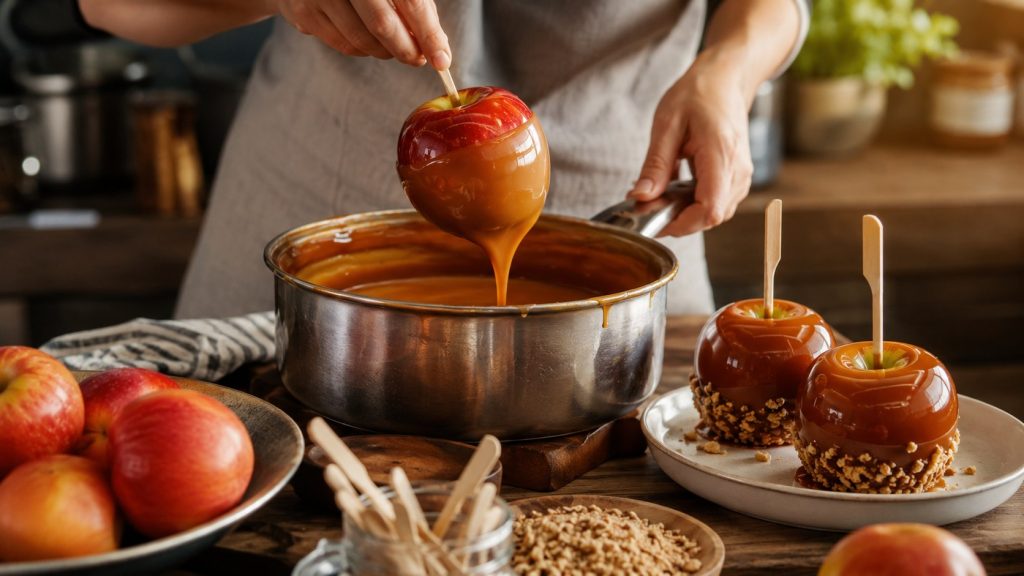
Remove one apple from the refrigerator and check that its surface remains dry. Hold the stick firmly and lower the fruit into the caramel at a slight angle.
Rotate the apple until the coating reaches close to the top. Lift it slowly, then allow the excess to drip back into the container. Turn the apple for 15–20 seconds so the layer settles evenly.
Use this technique for a cleaner finish:
- tilt the caramel container instead of forcing the apple downward;
- cover most of the fruit but leave a narrow ring near the stick;
- scrape excess caramel from the bottom against the container;
- rotate the coated apple before placing it down;
- add toppings immediately, before the surface sets.
Place each finished apple on lightly greased parchment. Standard wax paper may adhere to warm caramel. A silicone baking mat also works well.
If the mixture becomes too thick, rewarm it over very low heat. Do not add water. A small splash of warm cream can loosen it, but adding too much may prevent proper setting.
The last apple may require extra tilting because the caramel level will be lower. A narrow container makes this easier and reduces waste.
Caramel Apple Toppings and Flavor Variations
Toppings should be chopped finely enough to adhere. Large pieces create gaps and may pull the coating away from the fruit.
| Variation | Recommended topping | Best apple pairing |
|---|---|---|
| Classic nut | Roasted peanuts or pecans | Granny Smith |
| Salted caramel | Flaky sea salt | Honeycrisp |
| Chocolate drizzle | Dark or milk chocolate | Pink Lady |
| Cookie crunch | Crushed chocolate cookies | Fuji |
| Autumn spice | Cinnamon sugar and pecans | Granny Smith |
| S’mores style | Graham crumbs and mini marshmallows | Honeycrisp |
Set out the toppings before cooking the caramel. Once an apple is dipped, the coating starts thickening almost immediately.
For a nut coating, roll only the lower half of the apple through chopped nuts. This keeps the top glossy and makes the dessert easier to handle. Toasting the nuts first improves aroma and reduces their raw flavor.
Chocolate should be added after the caramel has set. Melt it gently, transfer it into a piping bag, and drizzle thin lines across the surface.
Flaky salt is especially effective with sweet apples. Use only a small amount because fine salt is already present inside the caramel.
Why Does Caramel Slide Off Apples?
Caramel usually slips because the skin is wet, waxy, or warm. An undercooked mixture can cause the same problem.
Common warning signs include:
- bare patches appearing immediately after dipping;
- a large caramel puddle around the base;
- thin, translucent coating;
- toppings falling away with the caramel;
- bubbles trapped across the surface.
Dry the fruit again when the coating exposes the skin. If every apple develops the same problem, check the caramel temperature. The mixture may not have cooked long enough.
A small pool at the base is normal. A broad puddle suggests excessive caramel, warm fruit, or a coating applied while the mixture was still too hot.
Air bubbles usually come from vigorous stirring. Stir slowly and allow the caramel to rest briefly before dipping. Small bubbles affect appearance but not flavor.
Troubleshooting Homemade Caramel
Several failures can be corrected before the entire batch is lost.
| Problem | Likely cause | Practical correction |
|---|---|---|
| Caramel slides off | Moisture or wax | Clean, dry, and chill the apples |
| Coating stays runny | Mixture was undercooked | Return it to heat and verify temperature |
| Caramel becomes hard | Temperature was too high | Reheat with a small amount of warm cream |
| Texture feels grainy | Sugar crystallized | Avoid scraping crystals from the pan |
| Coating contains bubbles | Mixture was stirred aggressively | Stir gently and rest before dipping |
| Apples stick to the liner | Surface was not greased | Use greased parchment or a silicone mat |
Correct one variable at a time. Adding excessive cream may soften the coating but can also prevent it from holding toppings.
When reheating, use low heat and monitor the thermometer. Caramel continues cooking quickly once it approaches the target range. Remove it from the burner before it overshoots.
Do not taste hot caramel directly from the spoon. Let a small drop cool completely on a plate first.
How Long Do Caramel Apples Need to Set?
Leave the dipped apples at cool room temperature for 20–30 minutes. Then refrigerate them until the caramel becomes firm.
For the cleanest presentation, allow the coating to set before adding a chocolate drizzle. Chilling for another 10–15 minutes will stabilize the decoration.
Eat the apples shortly after preparation or keep them refrigerated. Iowa State University Extension advises that caramel apples should be eaten freshly made or refrigerated because inserting a stick punctures the fruit.
Wrap each apple individually only after the coating has hardened. Cellophane bags work better than tight plastic wrap because they reduce contact with the surface.
Serve the apples cold or let them stand for 10 minutes before eating. A brief rest softens the caramel slightly and makes slicing easier.
How to Store and Serve Caramel Apples
Keep finished apples in the refrigerator. Place them in a single layer and prevent them from touching.
For easier eating, cut each apple into wedges shortly before serving. Hold the stick and slice downward beside the core. Rotate the fruit and repeat until the core remains.
Follow these recommendations:
- Refrigerate the apples soon after the coating sets.
- Keep them covered to prevent refrigerator odors.
- Avoid stacking them.
- Use a clean knife for slicing.
- Discard fruit with leakage, fermentation odors, or visible spoilage.
Whole caramel apples are best when prepared close to serving time. Their quality declines as moisture moves from the apple into the coating.
Do not freeze them. Freezing changes the texture of the raw apple and may cause the caramel to separate after thawing.
FAQ About Making Caramel Apples
Can I make caramel apples without a candy thermometer?
Yes, but the result will be less predictable. Drop a small amount into cold water. It should form a firm ball that still flattens when pressed. A thermometer remains more accurate.
Can I use store-bought caramel candies?
Yes. Melt unwrapped candies with a small amount of cream according to the package directions. The coating may be softer and sweeter than homemade caramel.
Why should the apples be cold?
Cold fruit helps the caramel thicken quickly. The surface must still be completely dry because condensation prevents adhesion.
What is the best temperature for caramel apples?
Cook homemade caramel to approximately 245–248°F, or 118–120°C. Allow it to cool before dipping. A working temperature near 180–190°F helps create a thicker coating.
Can I prepare caramel apples one day ahead?
Yes. Refrigerate them in a single layer after the coating sets. For the best texture and appearance, serve them within 24 hours.
How do I stop caramel from pooling at the bottom?
Let excess coating drip into the container. Scrape the base lightly and rotate the apple for several seconds before placing it on parchment.
Should apples be washed with soap?
No. The FDA recommends plain running water and gentle rubbing. Soap and detergents are not recommended for washing porous produce.
Which toppings should be added immediately?
Nuts, cookie crumbs, sprinkles, and small candies should be added while the caramel remains tacky. Chocolate drizzle should be added after the first layer sets.
Earlier we wrote about How to Make Crab Cakes: A Crisp, Tender Maryland-Style Recipe