How to make waffles at home is a culinary ritual that transforms the simplest pantry staples into a textured masterpiece of gold and steam. There is a primal joy in watching a pale, liquid batter transform into a rigid, honeycomb structure within the confines of a hot iron. While many settle for the convenience of frozen alternatives, they sacrifice the nuanced contrast between a shatteringly crisp shell and a tender, airy heart. Mastering this craft allows you to dictate the flavor profile, ensuring each bite is exactly as sweet or savory as you desire, as noted by the customreceipt.com.
Waffle Iron vs Belgian Waffle Maker: Which Do You Need?
The architecture of your breakfast depends entirely on the machinery sitting on your kitchen counter. Classic waffle irons produce thin, dense discs that offer a higher surface-area-to-volume ratio, making them the preferred choice for those who prioritize maximum crunch in every mouthful.
Belgian makers feature much deeper reservoirs.
This specific design is intended to accommodate yeasted batters or those leavened with egg whites, allowing the interior to expand into a cloud-like consistency. If you are searching for an easy waffle recipe, understanding how your specific device handles heat distribution is paramount to avoiding raw centers or burnt edges.
Modern electric models often include “ready” lights, but seasoned cooks know that the steam is the only honest indicator of progress.
| Device Type | Grid Depth | Batter Style | Final Texture | Best For |
| Standard Iron | Shallow | Thin/Liquid | Crunchy & Consistent | Quick weekday meals |
| Belgian Maker | Deep | Thick/Airy | Fluffy & Substantial | Gourmet weekend brunch |
| Mini Maker | Variable | Any | Soft & Compact | Portability and kids |
Choosing the right tool is the first step toward achieving professional results in a domestic setting. Deep-pocketed Belgian models require a thicker batter to hold their shape, whereas standard irons can handle thinner, more pourable mixtures. Once you have mastered the mechanical nuances of your iron, the focus shifts to the chemical composition of the batter itself. Proper maintenance of the non-stick surface is also vital, as any residue can cause tearing during the crucial release phase.
Perfect Waffle Batter Ingredients
The blueprint for homemade waffles relies on a precise balance of fats, proteins, and starches. You will need 2 cups of all-purpose flour to provide the structural skeleton of the dish.
To this, add 2 tablespoons of granulated sugar for browning and 1 tablespoon of baking powder for an immediate lift upon contact with the heat. A half-teaspoon of salt is necessary to sharpen the other flavors, while a teaspoon of vanilla extract provides a nostalgic aromatic depth.
Don’t forget the secret weapon.
By incorporating 1 tablespoon of cornstarch into your dry mix, you chemically ensure a crispier exterior that resists the softening effects of steam. For the liquid components, prepare 1.75 cups of whole milk, 0.5 cup of melted unsalted butter, and 2 large eggs. Separating the eggs—adding yolks to the liquid and whipping the whites separately—is the definitive hallmark of the best waffle recipe ever conceived.
Step-by-Step Waffle Making Instructions
Step 1 — Mix dry ingredients
Whisk your flour, sugar, salt, baking powder, and cornstarch together in a large bowl until the mixture is perfectly homogenous.
Step 2 — Combine wet ingredients
In a separate vessel, blend the milk, melted butter, vanilla, and egg yolks, ensuring the butter has cooled enough not to scramble the yolks.
Step 3 — Whip egg whites to soft peaks
Use a hand mixer to beat the whites until they hold their shape but still look glossy.
Step 4 — Combine wet and dry gently
Make a well in the center of the dry ingredients and pour in the milk mixture, stirring with a light touch. A few lumps are your friends here, as over-working the flour will result in a rubbery, tough texture that no amount of syrup can save.
Step 5 — Fold in egg whites
Using a rubber spatula, lift the batter over the egg whites in a folding motion until only a few white streaks remain visible.
Step 6 — Preheat and grease waffle iron
Wait for your iron to reach its peak temperature before adding a light mist of oil or a brush of butter.
Step 7 — Cook until steam stops
Pour the batter, close the lid, and resist the urge to peek. When the visible steam dissipates, your waffle recipe from scratch has achieved its final, golden form.
Tips for Crispy Waffles Every Time
- Always use cornstarch to reduce gluten-induced sogginess.
- Avoid the temptation to press the iron handle down firmly.
- Monitor the steam flow; silence from the iron means the waffle is done.
- Immediately transfer the finished product to a wire rack.
- Check that your baking powder is fresh for maximum leavening power.
- Use full-fat milk to ensure the richest possible flavor and better browning.
- Never stack hot waffles on top of each other while serving.
- Wait for the iron to cycle back to high heat between every batch.
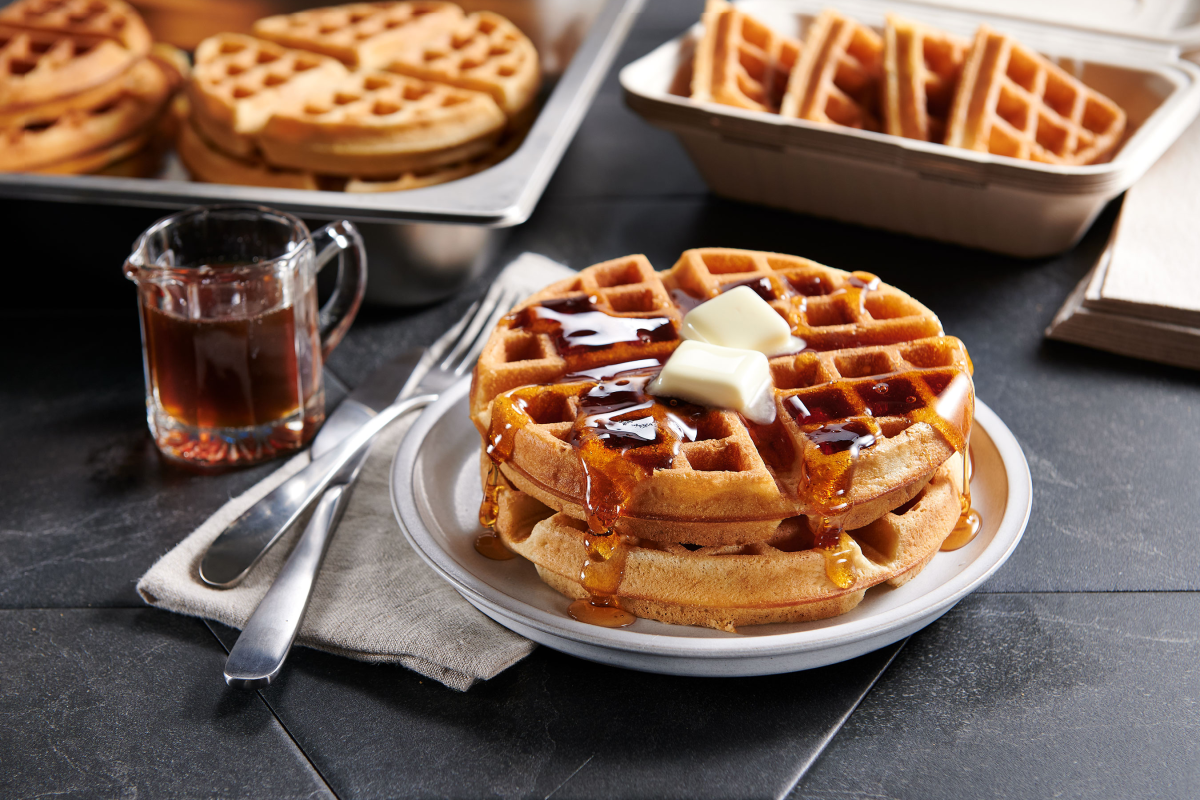
The wire rack is perhaps the most underrated tool in the pursuit of crispy waffles. If a hot waffle is placed directly onto a cold ceramic plate, the heat trapped underneath creates immediate condensation. This moisture is the enemy of crunch, turning a masterpiece into a soggy sponge in less than sixty seconds. By allowing air to circulate around the entire waffle, you preserve the integrity of the crust you worked so hard to build.
Creative Waffle Topping Ideas
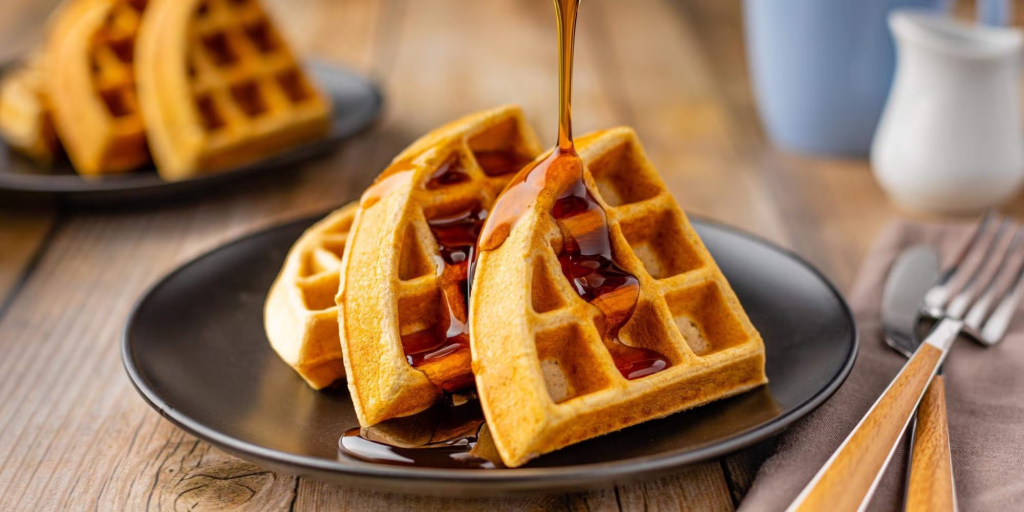
While traditionalists insist on a square of salted butter and a lake of amber maple syrup, the waffle is a versatile canvas.
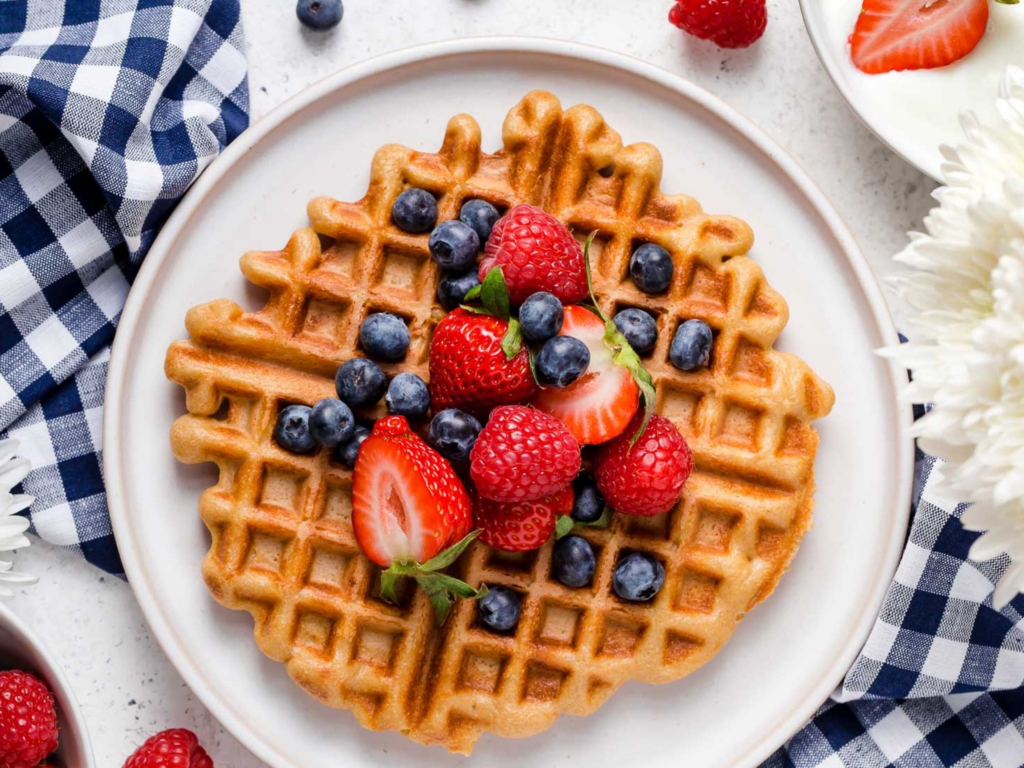
Fresh raspberries paired with a zest-infused mascarpone cream can elevate the dish to a dessert status. For those who crave the savory side of life, a combination of crispy bacon and a fried egg creates a harmonious balance of salt and fat.
Fried chicken remains the ultimate partner for deep-pocketed waffles, especially when finished with a drizzle of spicy honey. Modern twists include smoked salmon and cream cheese for a bagel-inspired brunch experience. Even simple additions like toasted pecans or a dusting of cinnamon sugar can provide a sophisticated touch to your morning routine.
Storing and Reheating Waffles
If you have leftovers, allow them to reach room temperature on your wire rack to prevent moisture buildup. Place them in a single layer inside a freezer-safe bag, separating layers with parchment paper if necessary. Reheating should never involve a microwave. To restore the original texture of your easy waffle recipe, use a standard toaster or a hot oven.
This brief blast of dry heat refreshes the fats and recrisps the edges, making them taste as though they were just pulled from the iron.
dvanced Heat Control for Golden Perfection
The temperature of your iron is the silent conductor of the breakfast orchestra. If the plates are too cold, the batter will stick and boil rather than sear; if they are too hot, the outside will burn before the interior has a chance to set. Most high-end machines offer a sliding scale of heat settings, but a medium-high setting is generally the “sweet spot” for achieving a uniform mahogany color.
Consistent heat is the foundation of texture.
Experienced home cooks often use a drop of water to test the readiness of the surface. If the droplet dances and evaporates instantly, the iron is ready for its first ladle of batter. This thermal shock is what creates the initial crust, locking in the steam that will eventually cook the middle of your homemade waffles.
Troubleshooting Common Batter Disasters
Even with a perfect plan, things can go sideways in the heat of the kitchen. If your batter seems too thin, like water, your waffles will lack the structural integrity to hold toppings. Conversely, a batter that is too thick will not spread to the edges of the iron, resulting in ragged, uneven shapes that cook inconsistently.
“Cooking is an art, but baking—and waffle making—is a precise science where ratios reign supreme.”
- Add a tablespoon of flour if the mixture is running off the spoon too quickly.
- Thin out a heavy batter with a splash of buttermilk or whole milk.
- Ensure all refrigerated ingredients are at room temperature to prevent the melted butter from seizing into clumps.
- Check your altitude, as high-elevation cooking requires slightly more flour and less leavening.
When you notice the batter sticking despite a greased surface, it often means the sugar content is too high or the iron wasn’t allowed to recover its heat between batches. Let the iron sit closed for sixty seconds before starting the next round to ensure the plates return to the optimal temperature. This patience is the hallmark of the best waffle recipe execution.
The Science of Flour Selection
Not all flours are created equal when it comes to the iron. While all-purpose flour is the standard for a reason, experimenting with pastry flour can lead to a delicate, melt-in-your-mouth crumb. However, avoid bread flour at all costs, as its high protein content will develop too much gluten, turning your breakfast into something resembling a chewy shoe sole.
For those seeking a healthier twist, a 50/50 split of whole wheat and white flour provides a nutty flavor without sacrificing the lift.
The bran in whole wheat can be sharp, often cutting through the delicate air bubbles, so a slightly longer rest for the batter helps soften those grains. This nuance is why a waffle recipe from scratch is so much more rewarding than a box mix; you control the grain.
Infusing Flavor Directly into the Grids
Why wait for toppings when you can build flavor into the core of the waffle? Folding in citrus zest, such as lemon or orange, adds a bright top note that cuts through the richness of the butter and syrup.
Some chefs even prefer to brown their butter before mixing it in, which introduces a toasted, nutty aroma that elevates the entire dish. A pinch of cinnamon or nutmeg goes a long way.
If you are feeling adventurous, finely chopped pecans or mini chocolate chips can be sprinkled directly onto the wet batter once it is in the iron. This technique ensures the inclusions are toasted by the heat of the metal rather than just sitting cold on top. It creates a multi-sensory experience that makes how to make waffles at home feel like a professional culinary production.
Why Resting the Batter Matters
While the whipped egg whites demand immediate action, the rest of the batter benefits from a brief period of stillness. Allowing the mixed base to sit for five to ten minutes gives the flour granules time to fully hydrate. This prevents a “gritty” mouthfeel and ensures that the baking powder has begun its initial chemical reaction.
If you are using a yeasted easy waffle recipe, this rest period is even more critical, sometimes extending overnight in the refrigerator. During this time, enzymes break down starches into simpler sugars, which results in a much deeper, more complex flavor profile and a superior golden-brown crust.
Even a short rest for non-yeasted versions allows the gluten to relax, ensuring your crispy waffles are tender rather than rubbery.

The Role of Fat in the Release Phase
Butter provides the flavor, but oil often provides the most reliable “release” from the iron’s grids. Some enthusiasts use a combination of both to get the best of both worlds: the savory depth of dairy and the high-heat stability of vegetable oil.
The fat serves as a barrier, preventing the starches in the flour from bonding to the microscopic pores of the metal plates. Never use aerosol sprays on non-stick irons. Over time, the chemicals in those sprays can create a sticky buildup that is nearly impossible to remove, eventually ruining the iron’s performance. Instead, use a silicone brush to apply a thin, even layer of melted fat or a high-smoke-point oil. This small detail ensures that your how to make waffles at home journey doesn’t end with a torn, stuck mess and a difficult cleanup.
FAQ
Can I substitute the butter for oil?
While oil works, butter provides a much better flavor and helps the exterior brown more evenly.
How do I prevent the batter from overflowing?
Usually, filling the iron about two-thirds full is the safe zone for most machines.
Is it okay to use bread flour?
Bread flour has too much protein, which will make your waffles excessively chewy rather than light.
What if I don’t have cornstarch?
You can omit it, but the waffles will be slightly softer and lose their crunch faster.
Why did my waffles turn out flat?
Check the expiration date on your baking powder or ensure you didn’t over-mix the egg whites.
The secret to knowing how to make waffles at home is patience and a respect for the science of the batter. By treating each step as a deliberate move toward texture, you ensure that every breakfast is a memorable event. Whether you are feeding a crowd or enjoying a quiet solo morning, these techniques will guarantee a golden, crispy result every single time.
Earlier we wrote about How to Make Fried Rice at Home: Restaurant-Style Recipe