How to make garlic bread is a culinary skill that bridges the gap between a simple weeknight dinner and a gourmet experience. There is something primal and deeply satisfying about the scent of roasting cloves and melting fats permeating a kitchen. Whether you are serving a hearty lasagna or a light summer minestrone, this side dish provides the essential crunch and savory depth required to balance a meal. It is a canvas for textures, ranging from the shatteringly crisp exterior to the pillow-soft, butter-soaked crumb within.
Expert bakers often suggest that the secret lies not just in the ingredients, but in the patience of the toast, as noted by the customreceipt.com.
Ingredients for Garlic Bread
Selecting the right foundation is the first step toward success.
A classic French baguette offers a sturdy structure and a high crust-to-crumb ratio, while a wide Italian loaf provides a softer, more indulgent bite that holds toppings exceptionally well. You will need roughly half a cup of high-quality softened butter—unsalted is preferred so you can control the seasoning manually.
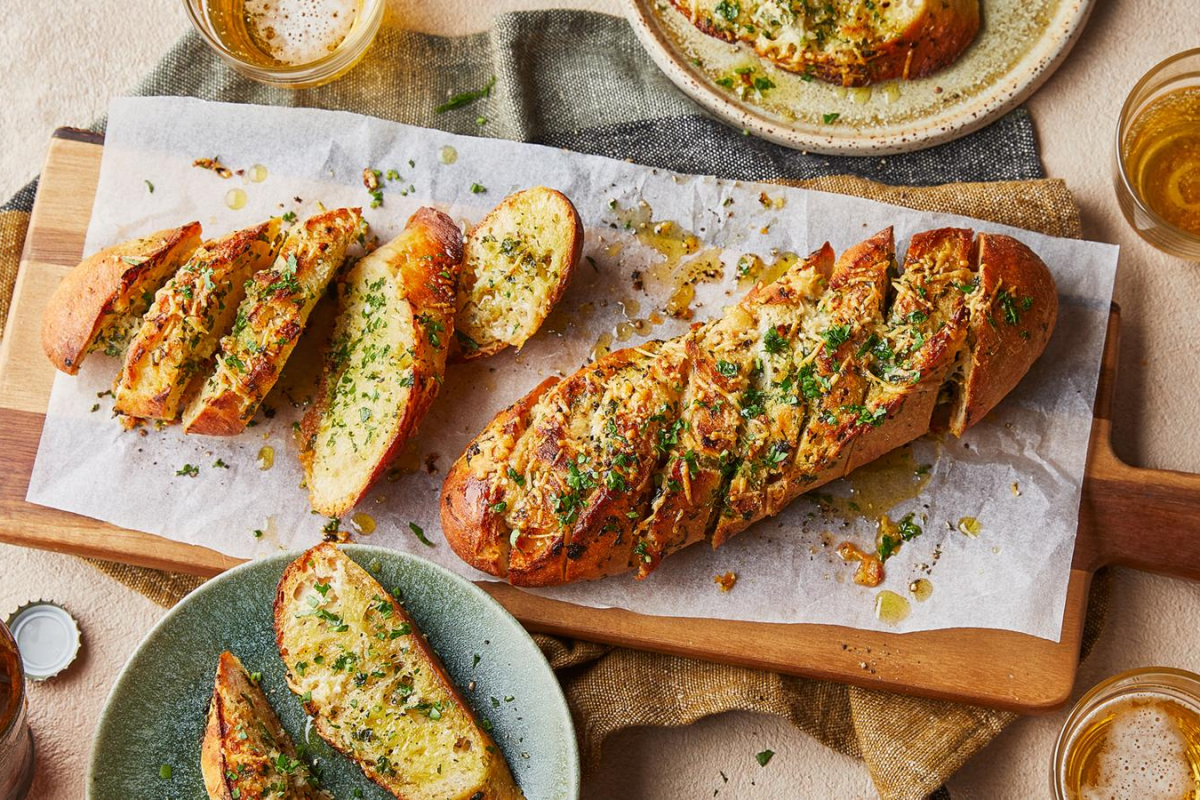
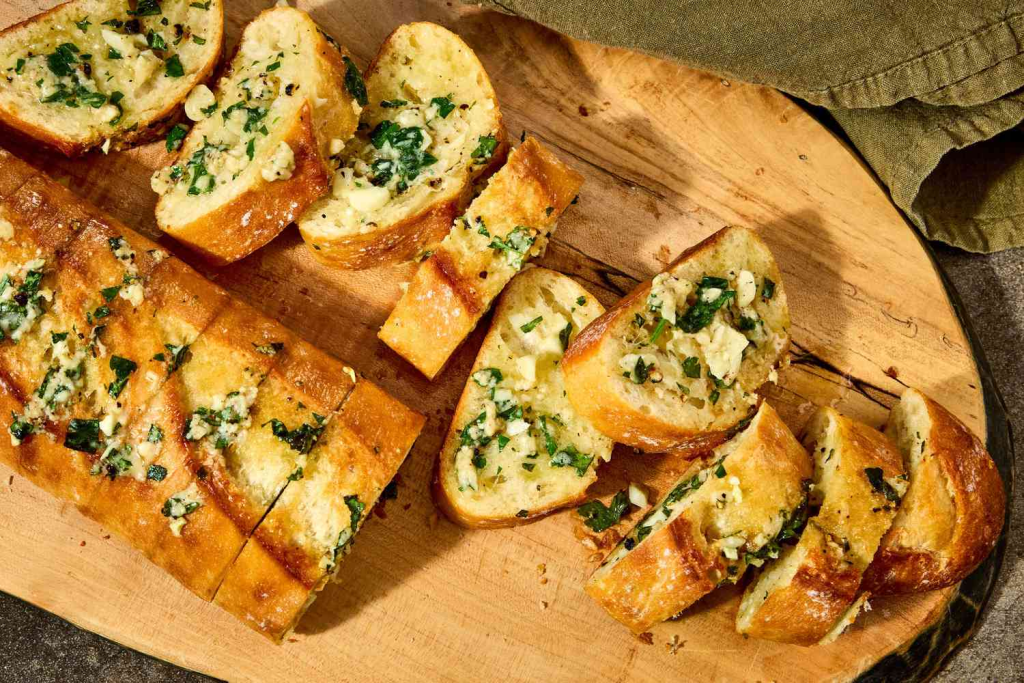
Freshness is paramount when dealing with aromatics. Three to four cloves of finely minced garlic will provide a pungent, authentic kick that pre-packaged powders simply cannot replicate. However, if you are in a rush, a single teaspoon of garlic powder can suffice in a pinch. Adding two tablespoons of freshly chopped parsley introduces a necessary brightness and a pop of green color to the golden surface.
“The difference between good bread and great bread is the quality of the fat and the freshness of the herb.”
For those who desire a more decadent finish, keep a bag of shredded mozzarella or a wedge of aged parmesan nearby. A small pinch of sea salt enhances the natural sugars in the toasted grain. This simple combination of fats and aromatics is what makes a garlic bread recipe truly stand out from the crowd.
Three Methods to Make Garlic Bread
There are several ways to achieve the perfect golden finish depending on your equipment and time constraints.
The oven method remains the gold standard for consistent results, requiring a steady temperature of 175 degrees Celsius for about ten to twelve minutes. This allows the butter to seep deep into the bread’s pores before the edges begin to brown. It is the most reliable way to feed a large family without stress.
Alternatively, the broiler method is the weapon of choice for the hungry and the impatient.
By placing the bread just inches from the top heating element, you can achieve a charred, bubbly surface in under three minutes. You must watch the tray like a hawk, as the transition from perfect to burnt happens in a matter of seconds. Speed is the priority here, but it requires your undivided attention.
| Method | Temperature | Time | Result |
| Oven Baking | 175 degrees Celsius | 10-12 minutes | Evenly toasted and soft middle |
| Broiling | High Heat | 2-3 minutes | Charred edges and bubbly top |
| Air Fryer | 180 degrees Celsius | 5-6 minutes | Extremely crispy and fast |
The air fryer has recently emerged as a cult favorite for small batches. Its rapid air circulation creates an incredibly uniform crunch that mimics a professional convection oven. Because the basket is compact, the heat stays intense, making it ideal for a quick snack for two. This modern appliance ensures that the homemade garlic bread you produce has that signature crackle.
The Perfect Garlic Butter
Mastering the spread is an art form in itself. You should aim for a “pomade” consistency with your butter—soft enough to spread without tearing the bread, but not oily or melted.
Slowly folding the minced garlic into the fat ensures every bite is infused with flavor. If you have extra time, consider using roasted garlic instead of raw. By roasting a whole head in the oven beforehand, the cloves turn into a sweet, caramelized paste that loses its sharp bite. This creates a much more sophisticated and mellow flavor profile.
- Soften the butter at room temperature for at least thirty minutes.
- Mince the garlic until it almost forms a paste to avoid large bitter chunks.
- Incorporate the herbs and salt using a small silicone spatula.
- Let the mixture sit for ten minutes to allow the flavors to marry.
Experimenting with herb variations can also elevate your easy garlic bread to new heights. While parsley is traditional, adding a hint of rosemary or thyme can introduce an earthy, woody aroma that pairs beautifully with red meats.
A touch of lemon zest can also cut through the richness.
Garlic Bread Variations
The world of seasoned dough extends far beyond the basic sliced loaf.
Cheesy garlic bread remains the most popular iteration, often involving a thick layer of melted provolone or monterey jack that stretches with every pull. This version is a favorite among children and adults alike.
Garlic knots offer a more playful, handheld experience, often seen in New York pizzerias. These are typically tossed in a bath of oil and herbs after being baked to maintain a soft, doughy interior. Meanwhile, pull-apart loaves are designed for social gatherings, allowing guests to tear off individual segments effortlessly.
Texas toast style is defined by its sheer thickness. By using extra-thick slices of white bread, you create a massive surface area for the cheesy garlic bread spread to soak in. This style is particularly effective when grilled on a flat-top stove or a heavy cast-iron skillet. For an international twist, garlic naan brings the flavors of India to the table, utilizing a yogurt-based flatbread baked in a high-heat environment.
Tips and Tricks
Achieving bakery-quality results at home requires attention to detail.
First, always grate your own cheese if using any; pre-shredded varieties are coated in potato starch which prevents a smooth melt. Second, don’t skimp on the salt, as it is the primary flavor enhancer for the butter. These small nuances separate the amateurs from the professionals.
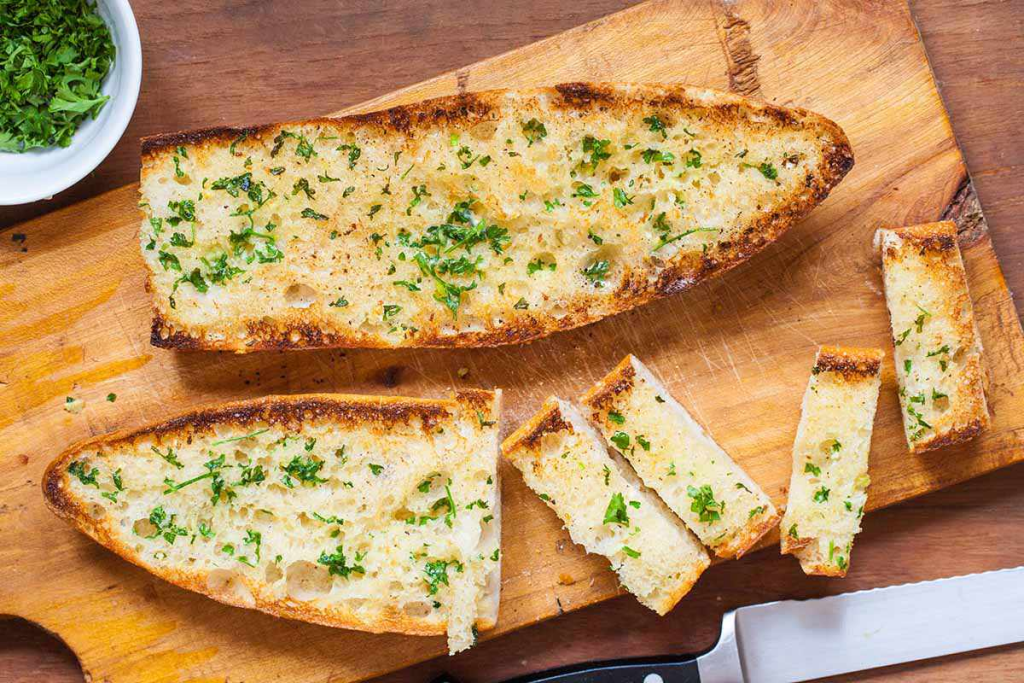
- Use a serrated knife to slice the bread without crushing the airy crumb.
- Apply the butter all the way to the very edges to prevent burning.
- Wrap the loaf in foil if you prefer a soft, steamed texture.
- Bake open-faced if you want maximum crunch and browning.
- Add a dash of red pepper flakes for a subtle heat.
- Store leftovers in an airtight bag to keep the bread from going stale.
These small adjustments can turn a standard garlic butter bread into the highlight of your dinner party. Many chefs also recommend a light dusting of paprika right before serving to add a smoky undertone and a professional visual finish. It is all about the final presentation.
FAQ
What is the best bread for this recipe?
Most professionals recommend a French baguette or a dense Italian loaf. These breads have enough structure to hold the heavy butter without becoming soggy or falling apart during the toasting process.
Can I make this ahead of time?
Yes, you can prepare the garlic butter and spread it on the bread up to 24 hours in advance.
Wrap the prepared bread tightly in plastic wrap or foil and keep it refrigerated until you are ready to bake. This is a great time-saver for busy hosts.
How do I store leftovers?
Leftovers can be kept at room temperature for a day or refrigerated for up to three days. To reheat, avoid the microwave, as it will make the bread rubbery; use a toaster oven or a standard oven for the best results.
Can I use margarine instead of butter?
While you can use margarine, the flavor will not be as rich or authentic.
Butter provides a specific mouthfeel and browning capability that oil-based spreads lack.
Is it possible to make this vegan?
Absolutely. Simply swap the dairy butter for a high-quality plant-based butter alternative and use nutritional yeast or vegan parmesan for that savory, cheesy kick.
Following a reliable technique ensures that you never have to settle for frozen, store-bought versions again. The joy of pulling a steaming, fragrant loaf out of your own oven is a simple pleasure that defines the heart of home cooking. It is about the crunch of the crust and the warmth of the kitchen.
Earlier we wrote about How to Make a Smoothie: Recipes, Tips, and Formula