 Frank Rondel
How to make onion rings with a crisp shell and tender center depends on 3 details: dry onions, cold coating, and controlled heat. Deep frying creates the lightest crust, while an air fryer or oven reduces oil and kitchen mess. Both methods can deliver satisfying results when the coating matches the cooking method, as the customreceipt.com editorial team notes.
The recipe below covers deep-fried, air-fried, oven-baked, and shallow-fried onion rings. It also explains which onions work best, why batter slips off, and how to reheat leftovers without making them soggy.
Ingredients for Homemade Onion Rings
Large yellow or sweet onions are the most practical choice. Yellow onions provide a sharper flavor, while Vidalia and other sweet varieties become mild during cooking. White onions remain firmer and taste slightly cleaner.
For about 4 servings, prepare:
- 2 large onions;
- 1 cup all-purpose flour;
- ¼ cup cornstarch;
- 1 teaspoon baking powder;
- 1 teaspoon fine salt;
- ½ teaspoon smoked or sweet paprika;
- ¼ teaspoon black pepper;
- 1 large egg;
- ¾ cup very cold sparkling water or beer;
- 1 cup panko breadcrumbs for air-fried or baked rings;
- neutral cooking oil as required.
Cornstarch makes the coating more brittle and less bread-like. Baking powder produces tiny air pockets when the batter reaches hot oil. Cold sparkling water delays gluten development and supports a lighter crust.
Do not mix the batter too early. A batter left on the counter becomes warmer and thicker. Prepare the onions first, then combine the wet and dry ingredients shortly before cooking.
Readers planning a larger homemade menu can pair the rings with this original Philly cheesesteak recipe. The sweet onion flavor works especially well beside thin beef and melted cheese.
How to Cut and Prepare the Onions
Cut off both ends of each onion and remove the papery skin. Slice the onion crosswise into pieces about ½ inch thick. Separate the slices carefully, keeping the largest and most even rings.
Very thin rings cook quickly but lose their juicy center. Extremely thick rings may remain harsh after the coating has browned. A thickness between ⅜ and ½ inch provides the best balance.
Follow this preparation order:
- Separate the onion slices into individual rings.
- Reserve damaged centers for soups, sauces, or sandwiches.
- Pat every ring dry with paper towels.
- Dust the rings with 2 tablespoons of flour.
- Place them on a tray while preparing the batter.
- Keep the batter cold until the cooking oil is ready.
The first flour layer is not decorative. It absorbs surface moisture and creates a dry base for the wet batter. Without it, the coating may slide away when the onion enters the oil.
Do not soak naturally mild onions unless their flavor is unusually sharp. Soaking in cold water can reduce pungency, but every ring must be dried thoroughly afterward. Remaining water weakens the coating and causes dangerous oil splatter.
Uniform rings cook at a similar speed. That matters more than producing perfectly round pieces.
For another recipe where moisture management determines the texture, see the guide to making a crisp bagel with cream cheese.
Deep-Fried Onion Rings: Step-by-Step Recipe
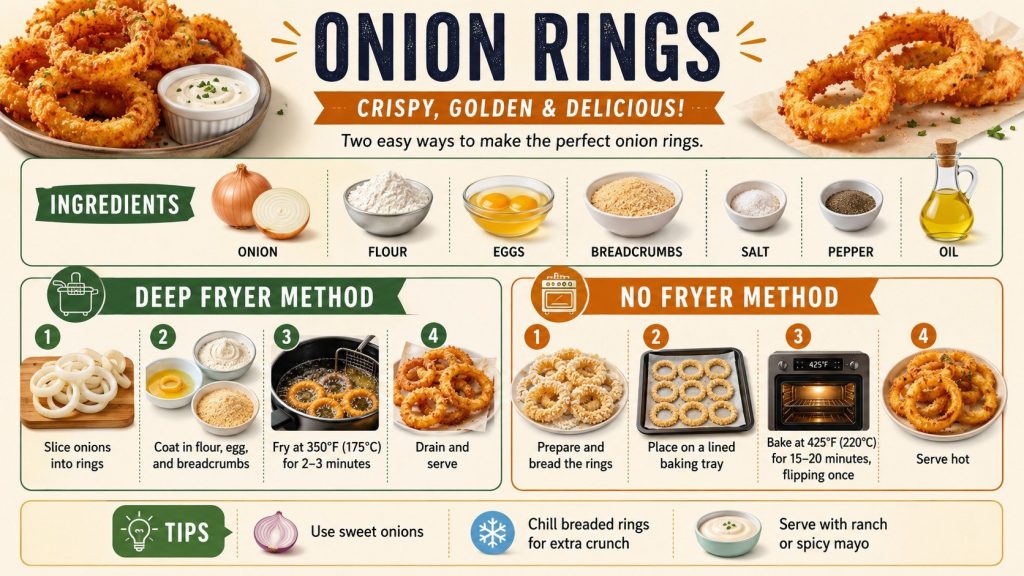
A deep fryer offers automatic temperature control. A heavy Dutch oven also works when paired with a reliable frying thermometer. Never fill a pot more than halfway with oil because its level rises after food enters.
Heat canola, peanut, sunflower, or another neutral high-temperature oil to 350–365°F. USDA guidance warns that deep-frying oil can exceed 400°F and may cause serious burns or fires. Water should never be used on an oil fire.
Prepare the batter shortly before frying:
- whisk the flour, cornstarch, baking powder, salt, paprika, and pepper;
- beat the egg with the cold sparkling water;
- pour the wet mixture into the dry ingredients;
- stir only until no large pockets of dry flour remain;
- leave several small lumps rather than overmixing.
Dip one floured onion ring into the batter. Let excess batter fall back into the bowl, then lower the ring carefully into the oil. Fry only 4–6 rings per batch, depending on the size of the fryer.
Cook them for about 2–3 minutes. Turn each ring once when the underside becomes golden. Transfer finished rings to a wire rack set over a sheet pan.
A wire rack allows steam to escape from every side. Paper towels absorb oil, but the underside often becomes damp. Season the rings immediately, while the surface still holds salt.
Keep the oil near 350°F between batches. Cold oil creates greasy rings because the coating absorbs fat before setting. Excessive heat darkens the batter before the onion softens.
“Deep frying in hot oil can be extremely dangerous.”
— U.S. Department of Agriculture, Food Safety and Inspection Service, home deep-frying safety guidance.
Deep Frying, Air Frying and Oven Baking Compared
Each method produces a different crust. The following comparison helps match the technique to the available equipment and desired texture.
| Method | Temperature | Cooking time | Oil required | Expected texture |
|---|---|---|---|---|
| Deep fryer | 350–365°F | 2–3 minutes | 4–8 cups | Lightest, crispest crust |
| Deep pot | 350–365°F | 2–3 minutes | 4–6 cups | Similar to restaurant rings |
| Shallow skillet | Medium-high heat | 2–4 minutes | ½–1 inch deep | Crisp but less even |
| Air fryer | 375°F | 10–14 minutes | Cooking spray | Dry, crunchy panko shell |
| Oven | 425°F | 18–24 minutes | 1–2 tablespoons | Firm, toasted coating |
Deep frying creates the most complete contact between fat and coating. The crust sets from every direction, which explains its even shape and color. However, it requires careful temperature control and leaves used oil behind.
An air fryer produces better results with breadcrumbs than with thin liquid batter. Wet batter may drip through the basket before it sets. Panko forms a stable shell and responds well to circulating hot air.
Oven-baked rings need stronger initial heat. A preheated metal baking sheet improves browning on the underside. Turning the rings halfway through cooking prevents pale, soft patches.
Shallow frying is useful without a deep fryer or air fryer. It consumes less oil than immersion frying, but the rings require careful turning. A heavy skillet distributes heat better than thin cookware.
The best method is not automatically the richest one. Choose deep frying for maximum delicacy and air frying for convenient weekday cooking.
How to Make Onion Rings Without a Deep Fryer
The most reliable onion rings without deep frying use a 3-stage coating. Liquid batter alone performs poorly in an oven or air fryer because it needs hot oil to set immediately.
Prepare 3 shallow bowls:
- Bowl 1: ½ cup flour with salt and paprika;
- Bowl 2: 1 beaten egg with 2 tablespoons milk;
- Bowl 3: 1 cup panko with 1 tablespoon oil.
Dip each dry onion ring into flour, then egg, and finally panko. Press the crumbs gently against both sides. Place the coated rings on a rack for 5 minutes before cooking.
This resting period helps the layers connect. It also reduces bare areas where crumbs can fall away. Do not rest them for much longer because the onion releases moisture.
Air Fryer Onion Rings
Preheat the air fryer to 375°F for about 3 minutes. Coat the basket lightly with cooking spray. Arrange the rings in one layer without overlapping them.
Air-fry the onion rings for 10–14 minutes. Turn them after 6–7 minutes and spray any dry flour spots. Small rings may finish earlier than large ones.
Do not overcrowd the basket. Air must move around the coating to dry and brown it. Cooking in 2 batches usually produces better rings than filling every available space.
The finished coating should be golden, dry, and firmly attached. Air-fried rings will not have the thin, blistered shell of battered deep-fried rings. Their texture is closer to a crisp breaded cutlet.
Serve each batch quickly. Holding air-fried rings in a covered container traps steam and softens the crumbs.
Oven-Baked Onion Rings
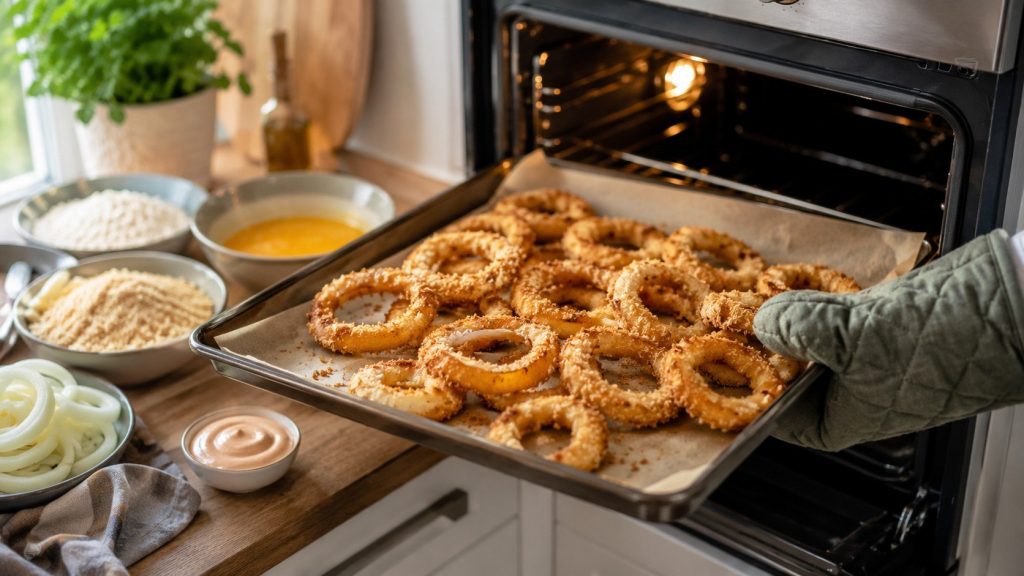
Preheat the oven to 425°F. Place a heavy sheet pan inside during preheating. The hot surface begins browning the underside as soon as the rings arrive.
Carefully remove the pan and brush it with about 1 tablespoon of oil. Arrange the breaded rings in a single layer. Leave at least ½ inch between them.
Bake for 10–12 minutes, then turn every ring. Continue baking for 8–12 minutes until both sides are browned. Thicker rings may need several additional minutes.
These steps improve oven results:
- use panko rather than fine breadcrumbs;
- oil the crumbs before coating;
- preheat the baking sheet;
- leave space around every ring;
- turn them with thin tongs;
- move pale rings closer to the edges of the pan.
Oven heat is less concentrated than hot oil. Therefore, the crumbs need a small amount of fat to brown rather than simply dry. Mixing oil into the panko distributes it more evenly than spraying only the surface.
The preheated pan is equally important. A cold sheet allows moisture to collect beneath the rings. That moisture creates a pale, soft bottom before evaporation begins.
Convection mode can shorten cooking by 2–4 minutes. Check the rings early because loose crumbs may darken quickly. Reduce the temperature to 400°F when the oven browns food aggressively.
For a contrasting meal after a crisp appetizer, the site’s traditional minestrone recipe explains how vegetables, beans, and pasta cook at different speeds.
Why Onion Ring Batter Falls Off
Loose coating usually signals excess moisture, weak flour adhesion, or incorrect oil temperature. The onion itself is smooth, so batter needs a dry intermediate layer.
Common warning signs include:
- batter sliding away before frying;
- bare onion visible after turning;
- crumbs collecting inside the fryer;
- a thick coating separating after the first bite;
- pale, oily patches on finished rings;
- dark crust surrounding a nearly raw onion.
Dry the onion rings first. Dust them lightly with flour and shake away the excess. Heavy flour deposits create dry pockets rather than stronger adhesion.
Check the batter consistency before frying. It should coat a spoon in a thin, continuous layer. Batter that runs like water needs a little flour. Batter resembling dough needs more cold liquid.
Allow excess batter to drain for several seconds. A very thick shell becomes heavy and separates from the onion. It can also brown before the center receives enough heat.
Place each ring into the oil individually. Dropping several rings together causes them to stick. Pulling them apart later tears the newly formed crust.
Maintain the oil temperature between batches. A thermometer is more dependable than judging heat by bubbles alone. Research on fried onion rings has also linked temperature and frying time with color, toughness, and overall sensory quality.
Best Oil for Frying Onion Rings
Choose a refined oil with a neutral flavor and a smoke point above the intended frying temperature. Canola, peanut, sunflower, corn, and refined vegetable oil are common choices.
Avoid unrefined oils with strong flavors. Extra-virgin oils can influence the taste and may become expensive when several cups are required. Butter is unsuitable because its milk solids burn.
The oil should not smoke. Smoke indicates overheating and degradation. Guidance from Hong Kong’s Centre for Food Safety recommends keeping deep-frying oil between 150°C and 180°C, equivalent to 302–356°F, to slow deterioration.
After cooking, allow the oil to cool completely. Strain it through a fine sieve into a clean, dry container. Discard oil that smells rancid, appears unusually dark, foams excessively, or smokes at a lower temperature than before.
Never pour cooking oil into a sink or toilet. Seal small amounts in a disposable container according to local waste rules. Some communities and recycling centers accept larger quantities of used cooking oil.
Dipping Sauces and Serving Ideas
Fresh onion rings need acidity or spice to balance their sweetness and fat. Ketchup works, but a homemade sauce provides stronger contrast.
Useful combinations include:
- mayonnaise, ketchup, pickle juice, and paprika;
- sour cream, lemon juice, dill, and black pepper;
- mayonnaise, hot sauce, and lime;
- Greek yogurt, mustard, honey, and garlic;
- ranch dressing with chopped scallions;
- barbecue sauce with a small amount of vinegar.
Mix dipping sauce before frying. Onion rings lose crispness while sitting, so serving should not wait for sauce preparation.
For a classic burger-style sauce, combine ¼ cup mayonnaise, 2 tablespoons ketchup, 1 teaspoon mustard, and 1 teaspoon pickle juice. Add smoked paprika or hot sauce to taste.
Serve the rings beside burgers, grilled chicken, pulled pork, sandwiches, or chili. Smaller rings also work as a crunchy topping when broken over salads.
Avoid covering the serving plate with foil. A loose paper-lined basket releases steam more effectively. Serve deep-fried rings within 10 minutes for the best crust.
How to Store and Reheat Onion Rings
Cool leftovers before placing them in a container. Refrigerate them within 2 hours. Layer parchment paper between rings to reduce sticking.
Reheat onion rings in an air fryer at 350°F for 3–5 minutes. An oven needs about 6–10 minutes at 375°F. Turn the rings once for even heating.
Do not microwave them unless texture is unimportant. Microwave energy heats internal moisture and quickly softens the crust. It can also make the onion unusually hot while the coating remains limp.
Frozen cooked rings can go directly into an air fryer or oven. Add several minutes to the reheating time. Do not thaw them on the counter because condensation wets the coating.
Discard leftovers with an unusual odor, visible mold, or extended unrefrigerated exposure. Reheating cannot reliably correct unsafe storage.
FAQ
How do you make onion rings crispy?
Dry the onions, coat them with flour, and use cold batter. Fry at 350–365°F without crowding the pot. Drain the rings on a wire rack.
Can you make onion rings without a deep fryer?
Yes. Use a heavy pot for deep frying, a skillet for shallow frying, or prepare breaded rings in an air fryer or oven.
What is the best onion for onion rings?
Large yellow onions provide balanced flavor and structure. Vidalia and other sweet onions create a milder result. White onions stay slightly firmer.
Why does the batter fall off onion rings?
The onion may be wet or missing its first flour coating. Warm, thin batter and low oil temperature can also weaken adhesion.
What temperature should oil be for onion rings?
Keep the oil around 350–365°F. Measure it with a frying thermometer and allow it to recover between batches.
Can wet-battered onion rings go into an air fryer?
Wet batter often drips through the basket. A flour, egg, and panko coating is more reliable for air-fried onion rings.
How long should onion rings cook in an air fryer?
Most breaded onion rings need 10–14 minutes at 375°F. Turn them halfway through cooking and avoid overlapping.
How do you bake onion rings in the oven?
Bake breaded rings at 425°F for 18–24 minutes. Use a preheated oiled sheet pan and turn the rings after 10–12 minutes.
Can onion rings be prepared ahead?
The onions can be sliced several hours ahead and refrigerated in a sealed container. Apply the coating shortly before cooking for better adhesion.
How do you keep onion rings crispy for a party?
Place cooked rings on a wire rack in a 200°F oven. Keep them uncovered and avoid stacking. Serve them as soon as possible.
Earlier we wrote about How to Make French Onion Soup: A Classic Bistro Recipe with Gruyère