 Frank Rondel
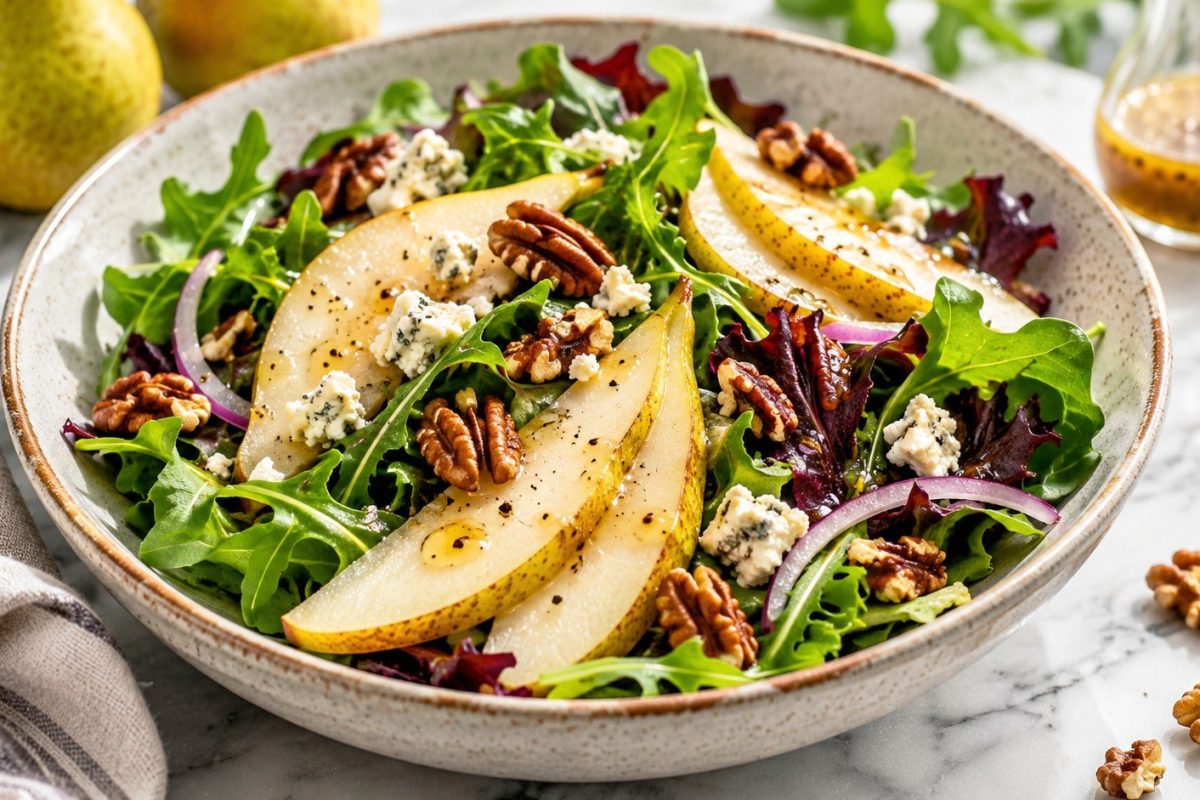
Pear salad combines juicy fruit, crisp greens, toasted walnuts, and creamy cheese in a dish that takes about 20 minutes to prepare. The secret lies in choosing pears with the right texture and balancing their sweetness with an acidic dressing. This recipe works as a light lunch, an elegant appetizer, or a side dish for roasted meat. Here is how to prepare it, select the best ingredients, and avoid common mistakes, as explained by customreceipt.com.
A good pear salad should taste fresh rather than sugary. Each ingredient has a specific purpose. Pears provide sweetness, greens contribute a slightly bitter contrast, and walnuts add crunch. Cheese brings richness, while a simple vinaigrette connects everything without overpowering the fruit.
The recipe requires no complicated equipment or unusual cooking techniques. However, the timing of preparation matters. Slice the pears too early, and they may discolor. Dress the greens too far ahead, and the leaves can lose their crispness.
What Ingredients Do You Need for a Classic Pear Salad?
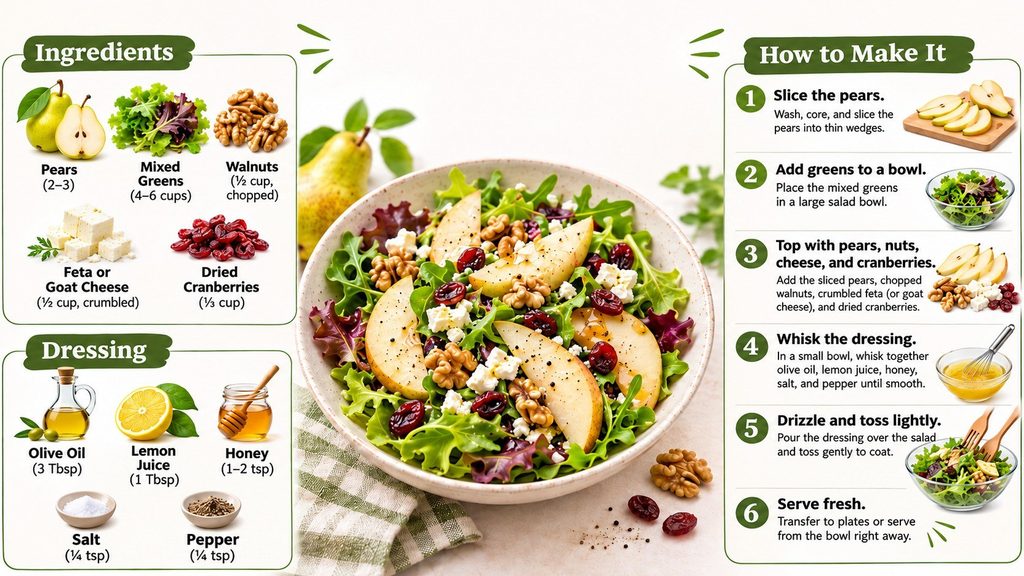
The most reliable combination starts with firm, ripe pears, peppery arugula, and toasted walnuts. Feta cheese adds a pleasantly salty contrast, although blue cheese or goat cheese also works.
For this pear salad recipe, the quantities below produce 4 side servings or 2 generous lunch portions.
| Ingredient | Quantity | Purpose |
|---|---|---|
| Fresh pears | 2 medium | Natural sweetness and texture |
| Baby arugula | 4 cups (80–100 g) | Peppery flavor |
| Baby spinach | 2 cups (40–60 g) | Mild, tender base |
| Walnuts | ½ cup (55 g) | Crunch and nutty flavor |
| Feta cheese | ⅓ cup (50 g) | Creaminess and saltiness |
| Red onion | ¼ small onion | Sharp contrast |
| Dried cranberries | 2 tbsp | Sweet-tart accent |
| Fresh lemon juice | 1 tsp | Helps limit pear browning |
These amounts are flexible, but the balance between fruit and greens deserves attention. Too many pears can make the dish resemble a fruit salad. Excessive feta creates the opposite problem, overpowering the fresh ingredients with salt.
Choose unsweetened dried cranberries when possible. Sweetened varieties work, although they may make additional honey unnecessary. If the pears are particularly sweet, reduce the cranberries or omit them entirely.
For a dairy-free version, replace feta with avocado or additional toasted nuts. The result will have a different texture but retain the essential balance.
How to Choose the Best Pears for Salad
Not every pear behaves the same way when sliced. Some varieties remain firm, while others soften quickly after ripening.
The ideal fruit should yield slightly near the stem without feeling mushy. A pear that is too hard may taste bland. An overripe one can fall apart when mixed with dressing.
The following varieties are particularly useful:
- Bosc pears: Firm flesh, pronounced sweetness, and excellent shape retention.
- Anjou pears: Juicy, mildly sweet, and suitable for thin slices.
- Bartlett pears: Fragrant and tender, especially when just ripe.
- Comice pears: Very sweet and buttery, better for gently assembled salads.
- Concorde pears: Firm, sweet, and suitable for attractive, even slices.
Bosc and Anjou are practical choices for beginners. They generally remain easier to handle when cut into thin wedges. Bartlett pears offer a softer texture, which can be appealing with stronger cheeses.
For the best texture, select pears that are ripe enough to taste sweet but firm enough to cut cleanly.
The University of Georgia’s pear selection and preparation guidance recommends checking ripeness near the stem. Gentle pressure can help determine whether the fruit is ready.
Keep unripe pears at room temperature until they mature. Refrigerate ripe fruit when you need to slow further softening. Avoid using pears with extensive bruising or signs of spoilage.
How to Make Honey Balsamic Dressing for Pear Salad
A homemade vinaigrette often determines whether the finished salad tastes balanced. Pears already supply natural sugar, so the dressing needs acidity rather than excessive sweetness.
For a classic pear salad dressing, combine olive oil, balsamic vinegar, Dijon mustard, and a little honey.
You will need:
- 3 tbsp extra-virgin olive oil
- 1½ tbsp balsamic vinegar
- 1 tsp Dijon mustard
- 1 tsp honey
- ½ tsp fresh lemon juice
- ¼ tsp freshly ground black pepper
- A small pinch of salt
Whisk the vinegar, mustard, honey, and lemon juice together first. Slowly add the olive oil while whisking until the mixture looks uniform. Taste before adding more salt, particularly when using feta.
The finished dressing should taste gently sweet, moderately sharp, and slightly savory. If it seems too acidic, add a few drops of honey. If it tastes heavy, incorporate a little lemon juice.
Balsamic vinegar varies significantly in sweetness and intensity. A syrupy balsamic glaze is not a direct substitute for ordinary vinegar. It can make the dressing noticeably sweeter and thicker.
For a lighter flavor, use apple cider vinegar instead. White wine vinegar also produces a clean, fresh result. Both alternatives allow the delicate pear flavor to remain prominent.
How to Make Pear Salad Step by Step
Once the ingredients are prepared, assembling the salad is straightforward. Work in the correct order to preserve the texture and prevent unnecessary moisture.
The following method produces a fresh, evenly dressed salad without crushing the pears.
- Wash and dry the greens. Rinse arugula and spinach under cool running water unless the package indicates they are ready to eat. Dry thoroughly.
- Toast the walnuts. Place them in a dry skillet over medium-low heat for 3–5 minutes. Stir regularly and remove when fragrant.
- Prepare the dressing. Whisk the ingredients in a small bowl until blended.
- Slice the onion. Cut it into very thin pieces to prevent its sharp flavor from dominating.
- Prepare the pears. Wash, quarter, core, and slice each pear into wedges approximately 5 mm thick.
- Add lemon juice. Gently coat the pear slices with 1 tsp lemon juice to limit discoloration.
- Arrange the greens. Spread arugula and spinach across a large serving platter.
- Add the remaining ingredients. Distribute pears, onion, cranberries, and cooled walnuts evenly.
- Finish with cheese. Crumble feta over the salad and drizzle with dressing just before serving.
Avoid pouring all the dressing into one area. Distribute it gradually, turning the greens gently to coat their surfaces. The pears should remain visible rather than becoming buried beneath the leaves.
Toast the walnuts before slicing the fruit whenever possible. This allows the nuts to cool while the remaining ingredients are prepared. Warm walnuts can soften nearby greens and cheese.
Use a wide platter instead of a deep bowl when appearance matters. A shallow arrangement helps maintain distinct textures and makes the dish easier to portion.
Serve immediately after dressing. The salad tastes best when its greens are crisp and the pear slices remain firm.
Why Pears, Walnuts and Cheese Work So Well Together
The appeal of this combination comes from contrasting flavors rather than complicated preparation. Pears have delicate sweetness, while walnuts contribute mild bitterness and a roasted aroma.
Cheese supplies richness that balances the fruit. Feta produces a fresh, salty finish. Blue cheese creates a stronger flavor, while goat cheese feels softer and slightly tangy.
This combination also appears in established recipes. The American Diabetes Association’s arugula and pear salad uses walnuts, blue cheese, and balsamic vinaigrette.
The association’s published version provides 170 calories per serving across 6 servings. That figure applies to its specific ingredients and quantities, not every pear salad.
A successful pear salad balances 4 elements: sweetness, acidity, richness, and crunch. When 1 dominates, the dish loses its freshness.
This is a practical culinary principle rather than a quotation from an external expert. It explains why a simple vinaigrette often performs better than a heavy, creamy sauce.
Adding a little bitterness through arugula or chicory can further improve the balance. The result is particularly appealing alongside rich foods, including roasted poultry.
Easy Pear Salad Variations for Different Occasions
A basic pear and walnut salad is adaptable enough for weekday meals and festive dinners. Small substitutions can change the character of the dish without complicating preparation.
Here are several combinations worth trying:
| Variation | Main additions | Flavor profile |
|---|---|---|
| Pear and blue cheese | Gorgonzola, walnuts | Rich and tangy |
| Pear and goat cheese | Soft goat cheese, pecans | Creamy and mild |
| Autumn pear salad | Roasted squash, pumpkin seeds | Earthy and filling |
| Pear and chicken | Cooked chicken, spinach | Savory and substantial |
| Vegan pear salad | Avocado, toasted almonds | Fresh and buttery |
| Holiday pear salad | Pomegranate, cranberries | Colorful and tart |
Choose additions according to the meal you intend to serve. Roasted squash works especially well during colder months. Pomegranate seeds provide a bright contrast for holiday gatherings.
A chicken version can become a complete lunch rather than a side dish. Use thoroughly cooked chicken and keep it refrigerated until assembly. Add the protein shortly before serving.
For a vegan option, omit cheese and replace honey with maple syrup. Toasted almonds or pecans provide additional texture. Avocado contributes creaminess without requiring a dairy substitute.
The easiest way to make pear salad more interesting is to change just 1 or 2 ingredients while preserving its sweet-tart balance.
Experimenting with different cheeses can produce surprisingly different results. A delicate pear may disappear beneath a particularly strong blue cheese. Start with a small quantity and adjust after tasting.
How to Make Warm Pear Salad with Roasted Pears
Fresh pears provide crunch, but roasting develops a deeper, softer sweetness. This technique works particularly well during autumn and winter.
Choose Bosc pears or another firm variety. Softer fruit can become mushy in the oven.
Heat the oven to 400°F (200°C). Cut 2 pears into thick wedges and remove their cores. Toss them with 1 tsp olive oil and a small pinch of salt.
Arrange the pieces on a parchment-lined baking sheet. Roast for approximately 12–18 minutes, turning once. Remove the pears when their edges begin to brown and their centers feel tender.
Let the wedges cool slightly before combining them with the greens. Very hot fruit can cause delicate leaves to wilt immediately. Warm pears pair especially well with goat cheese, walnuts, and a mustard vinaigrette.
Roasted pears also develop a softer texture than their fresh counterparts. For added contrast, use crisp chicory or baby kale instead of spinach. Avoid roasting fruit that is already excessively ripe.
Common Mistakes That Can Ruin Pear Salad
Even a simple recipe has several opportunities for error. Most problems involve excess moisture, poor fruit selection, or incorrect timing.
Watch for these common mistakes:
- Using overripe pears that collapse during mixing.
- Dressing the salad too early and softening the greens.
- Adding wet leaves that dilute the vinaigrette.
- Burning the walnuts during toasting.
- Using excessive honey with already sweet pears.
- Cutting pear slices too thin for the chosen variety.
A salad spinner is particularly useful for removing water from washed greens. Otherwise, dry the leaves with a clean kitchen towel. Remaining moisture prevents the dressing from coating them properly.
A small amount of lemon juice helps slow browning after pears are sliced. However, it cannot restore fruit that has already discolored. Prepare the pears close to serving time for the best appearance.
Salt should also be used cautiously. Feta, blue cheese, and some roasted nuts may already contain considerable amounts. Taste the finished combination before adding extra seasoning.
Finally, avoid overcrowding the serving bowl. Pear slices are easier to keep intact when the ingredients have sufficient space.
Can You Make Pear Salad Ahead of Time?
The individual ingredients can be prepared ahead, but the complete dish is best assembled shortly before serving.
Wash and dry the greens, then refrigerate them in a covered container. Prepare the dressing separately and keep it chilled. Walnuts can be toasted in advance and stored after cooling completely.
Leave the pears whole until the final preparation stage. This helps maintain their natural color and texture. If necessary, cut them shortly before serving and use a little lemon juice.
The FDA’s food storage guidance emphasizes prompt refrigeration of perishable ingredients. Cut produce should not remain at room temperature for more than 2 hours.
Keep your refrigerator at 40°F (4°C) or below. Refrigerate leftovers promptly in a covered container. For the best eating quality, consume a dressed salad soon after preparation.
Already dressed greens may become limp during storage. If meal preparation is the priority, divide the components into separate containers. Combine them only when ready to eat.
What to Serve with Pear Salad
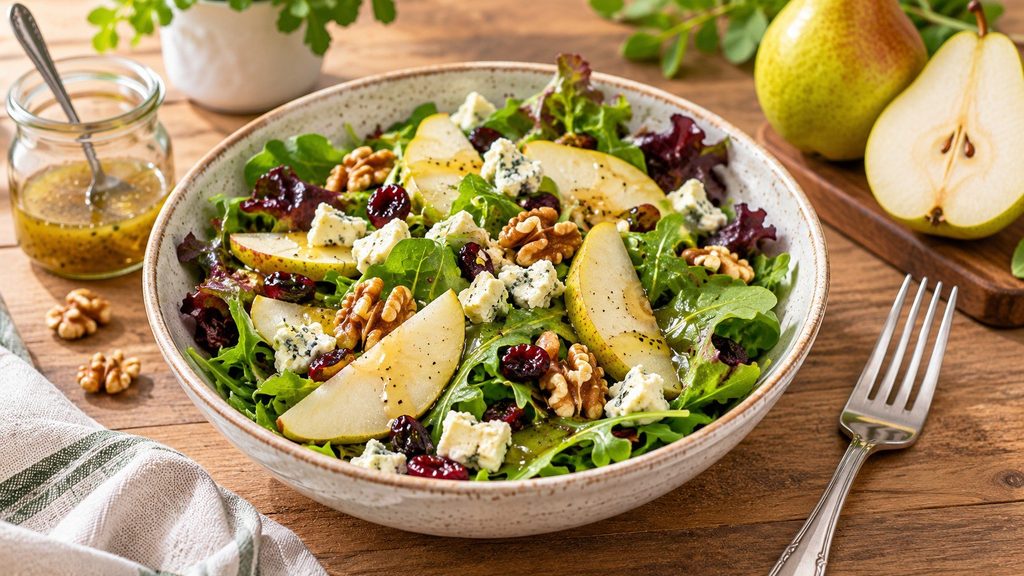
This salad works well alongside rich, savory dishes because its fruit and vinegar provide contrast. Its preparation time also makes it convenient for meals requiring more elaborate main courses.
Roast chicken is an especially suitable pairing. The mild sweetness of pears complements browned poultry skin without overwhelming it. Pork tenderloin offers a similarly effective combination.
For vegetarian meals, serve pear salad alongside roasted sweet potatoes, mushroom risotto, or a warm grain dish. Quinoa and lentils can also be added directly to the salad.
Bread provides another simple option. Toasted sourdough or a crusty baguette makes a light lunch more satisfying. A thin layer of soft cheese on the bread can connect the meal’s flavors.
For entertaining, serve individual portions on chilled plates. Arrange the pear slices in overlapping sections and scatter the walnuts across the top. Add dressing immediately before the plates reach the guests.
FAQ: Pear Salad Recipe and Preparation
What is the best cheese for pear salad?
Feta, goat cheese, and blue cheese are all suitable. Feta offers mild saltiness, while goat cheese provides creaminess. Blue cheese creates a stronger contrast with sweet pears.
Can I make pear salad without walnuts?
Yes. Pecans, almonds, pumpkin seeds, or sunflower seeds can replace walnuts. Toasting them briefly improves their aroma and texture. Choose seeds when avoiding tree nuts.
What dressing goes best with pear salad?
Honey balsamic vinaigrette is a versatile choice. Lemon dressing, apple cider vinaigrette, and Dijon mustard dressing also work. The ideal acidity depends on the pears’ sweetness.
Should pears be peeled before adding them to salad?
Peeling is optional. Leaving the skin intact adds color and helps firm slices hold their shape. Wash the fruit thoroughly before cutting.
How do you keep pears from turning brown?
Toss freshly sliced pears with a small quantity of lemon juice. The acidity slows enzymatic browning. Cutting the fruit immediately before serving is still the most reliable approach.
Can I use canned pears?
Yes, although the texture will be considerably softer. Drain them thoroughly and reduce sweet ingredients in the dressing. Pears packed in juice are generally preferable to those in heavy syrup.
Is pear salad suitable for a light dinner?
Yes, particularly when combined with protein or grains. Add cooked chicken, quinoa, chickpeas, or lentils to make it more substantial. Adjust the serving size according to your needs.
How long does homemade pear salad last?
It is best eaten immediately after dressing. Separately refrigerated ingredients generally retain their quality better than a fully assembled salad. Always follow safe refrigeration practices.
A well-prepared pear salad needs little more than quality fruit, crisp greens, and thoughtful seasoning. Start with the classic walnut and feta combination, then adjust the ingredients to suit your meal.
Earlier we wrote about How to Make Roasted Potatoes at 425°F: The Secret to Crispy Golden Edges