
How to brew beer at home is not only a craft hobby for people with garages, stainless steel tanks, and complicated notebooks. A first batch can be made in an ordinary kitchen with a pot, a fermenter, clean bottles, and a careful attitude to timing. The real secret is not expensive equipment, but clean tools, stable temperature, fresh yeast, and patience. A beginner should start with a small 5-liter pale ale because it is easier to cool, cheaper to repeat, and more forgiving than strong dark beers or lagers. If you already enjoy practical kitchen projects, this process is close in spirit to homemade bread, where fermentation and timing decide the final result, as noted by customreceipt.com.
Start small.
A 5-liter batch teaches almost everything without turning the kitchen into a production site. You will still learn how malt creates sugar, how hops shape bitterness, and how yeast turns sweet wort into beer. But if something goes wrong, you lose 5 liters, not 20.
That matters because first batches are lessons, not trophies.
Why this home beer recipe works for beginners
A simple pale ale is the best starting point because it does not demand cold fermentation. Lagers need lower temperatures and more patience, while strong beers often require longer aging. Pale ale ferments well at normal room temperature if the room is not too hot. It also gives enough hop aroma to feel like craft beer, but not so much bitterness that every small mistake becomes obvious.
The recipe below uses malt extract. That means you do not need to mash several kilograms of grain or control complex enzyme temperatures. Malt extract already contains fermentable sugars, so the process becomes shorter and easier. You still get a real beer-making experience because you boil wort, add hops, cool it, pitch yeast, ferment, bottle, and carbonate naturally.
The first goal is not to create the most original beer in the neighborhood. The first goal is to make a clean, drinkable beer you can repeat.
A brewer would probably put it like this:
Good beer begins before the boil. It begins when every spoon, tube, bottle, and lid is clean.
That is the real discipline of beginner brewing. Recipes are important, but hygiene decides whether the beer tastes fresh or strange. The same logic works in many homemade food projects: if you like precise texture and controlled resting time, the guide to homemade udon is a good example of how small technical details change the final result.
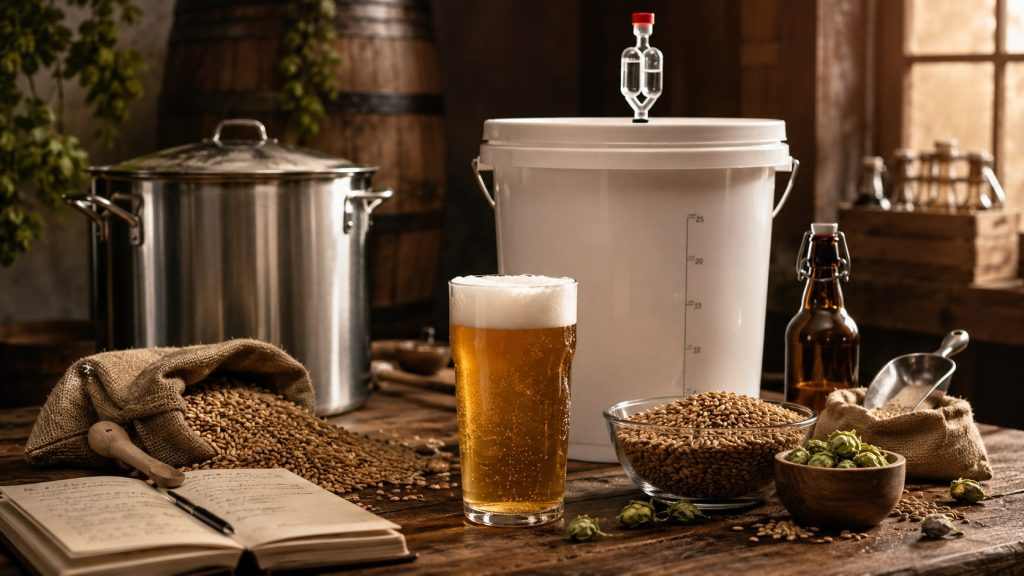
Equipment you need before brewing
You can brew beer at home without a professional setup. Still, some tools are not optional if you want a safe result. A kitchen pot alone is not enough because cooled wort is vulnerable to bacteria and wild yeast. Once the boil ends, everything that touches the liquid must be sanitized.
You need the following equipment:
- Brewing pot of at least 7–8 liters.
- Fermenter with lid.
- Airlock.
- Kitchen thermometer.
- Food-safe sanitizer.
- Long spoon.
- Kitchen scale.
- Siphon or bottling tube.
- Beer bottles.
- Caps and bottle capper.
- Clean towel.
- Spray bottle for sanitizer.
This list looks longer than it feels in practice. Most items are small and reusable. The fermenter, airlock, capper, and thermometer will serve many batches if you clean them properly. Bottles can also be reused, but only if they are strong beer bottles, not thin decorative glass.
Cheap equipment is acceptable.
Dirty equipment is not.
Keep one rule in mind: anything that touches cooled wort must be sanitized. Not rinsed. Not wiped quickly. Sanitized.
Ingredients for 5 liters of homemade beer
For a first batch, buy fresh ingredients from a brewing shop if possible. Old hops lose aroma, old yeast may work slowly, and badly stored malt extract can taste dull. You do not need luxury ingredients, but you do need reliable ones.
| Ingredient | Amount | Purpose |
|---|---|---|
| Light dry malt extract | 650 g | Main malt body and fermentable sugar |
| Crystal malt | 100 g | Color, body, and light caramel flavor |
| Cascade, Citra, or Centennial hops | 12–15 g | Bitterness and aroma |
| Ale yeast | 3–5 g | Fermentation and flavor development |
| Filtered or bottled water | 5.5–6 liters | Main base of the beer |
| Sugar for bottling | 30–35 g | Natural carbonation |
Water deserves attention. Strong chlorine smell is bad for beer because it can create medicinal notes. If your tap water smells like a swimming pool, use filtered water or bottled spring water. You do not need advanced mineral chemistry for this recipe. You just need clean, neutral water.
After preparing the ingredients, organize the workspace. Put the sanitizer near the sink. Keep the thermometer ready. Place bottles and caps away from dirty surfaces. This seems boring, but it saves the brew day from chaos. The best brewing days feel almost quiet, just like slow cooking projects where control matters more than speed, for example restaurant-style pasta at home.
Step-by-step method: from malt to wort
Heat 2.5 liters of water to about 68°C. Put the crushed crystal malt into a grain bag and steep it for 20–25 minutes. Do not boil the grain. High heat can pull harsh tannins from the husks, and that bitterness is not the clean hop bitterness people expect in pale ale.
Remove the grain bag and let it drain naturally.
Do not squeeze it aggressively. The liquid should now look deeper in color and smell lightly sweet.
Turn off the heat before adding malt extract.
This short pause prevents the extract from burning on the bottom of the pot. Add the extract slowly and stir until it fully dissolves. Then bring the wort to a gentle boil. Watch the pot carefully because wort can foam up quickly at the start.
Now add hops in 2 stages:
- Add about 10 g of hops at the start of a 30-minute boil.
- Add the remaining 3–5 g during the final 5 minutes.
- Turn off the heat after 30 minutes.
- Cover the pot while preparing the ice bath.
- Cool the wort as quickly as possible.
After this stage, the beer is not beer yet. It is wort: sweet, bitter, aromatic liquid waiting for yeast. The faster you cool it, the lower the risk of contamination. Put the pot into a sink or basin with cold water and ice. Stir the ice water around the pot, but do not splash dirty water into the wort.
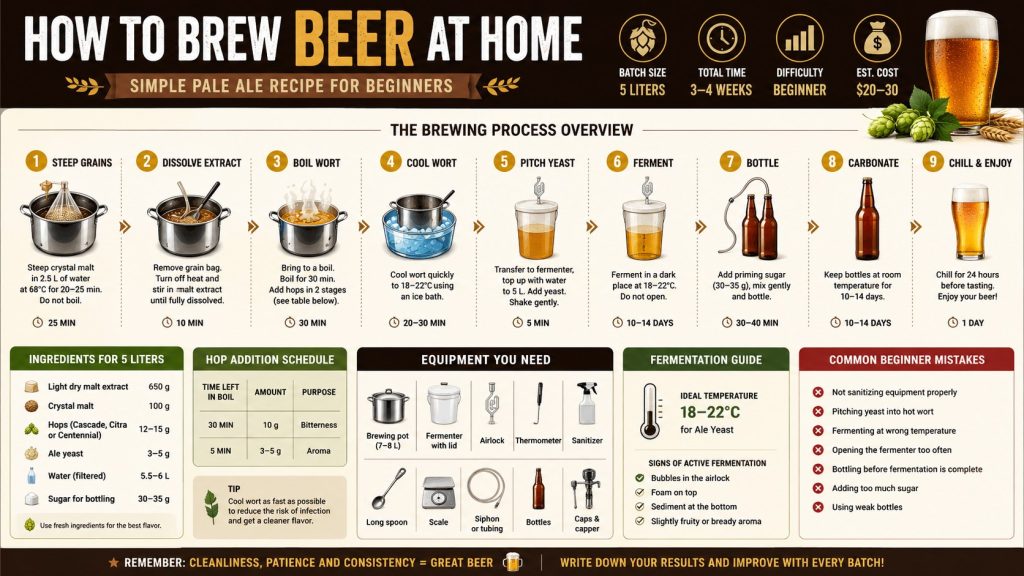
Cooling and pitching yeast
Cool the wort to 18–22°C. This range is safe for many ale yeasts. If you add yeast while the wort is too hot, the yeast can be damaged or killed. If the wort is too cold, fermentation may start slowly.
Pour the cooled wort into the sanitized fermenter.
Add clean water until the total volume reaches 5 liters. Close the fermenter and shake it gently for a short time to add oxygen. Yeast needs oxygen at the beginning of fermentation.
Then add the yeast.
Do not stir with an unsanitized spoon. Do not touch the inside of the lid. Do not lean over the open fermenter while talking. These small habits matter because cooled wort is an easy target for unwanted microbes.
Yeast is the quiet worker in the room. It does not need drama, but it needs the right conditions.
Seal the fermenter and attach the airlock. Move it to a dark place with stable temperature. A cupboard, pantry, or shaded corner can work if the temperature stays steady.
Fermentation: what happens during 10–14 days
Fermentation usually begins within 12–36 hours. You may see bubbles in the airlock, foam on top of the beer, or sediment at the bottom. These signs are normal. They mean yeast is active and converting sugars into alcohol and carbon dioxide.
Do not panic if the airlock is not bubbling like a machine. Sometimes the lid is not perfectly sealed, and gas escapes elsewhere. The beer may still be fermenting. Look for foam, aroma, and later, sediment.
Temperature control is critical here. Most ale yeast performs well at 18–22°C. If the room is too warm, the beer may taste sharp, fruity in a bad way, or solvent-like. If it is too cold, fermentation may slow down and leave the beer too sweet.
Beer fermentation rewards patience more than curiosity.
Do not open the fermenter every day. Every opening brings oxygen and infection risk. Leave it alone for at least 10 days. If you do not have a hydrometer, wait 14 days before bottling. If you have one, bottle only when readings remain stable for 2–3 days.
Bottling and carbonation without explosions
Bottling is where many beginners make dangerous mistakes. Beer can look finished and still contain fermentable sugar. If you add too much bottling sugar or bottle too early, pressure can build inside the glass.
Use 30–35 g of sugar for 5 liters. Dissolve it in a small amount of boiled water, then cool it. Mix it gently with the beer before bottling. Avoid splashing because oxygen can damage flavor.
Clean bottles are not enough.
They must be sanitized. Caps too. Bottling tubes too. The bucket or fermenter tap too. This is the moment when people often relax, and that is when the beer gets infected.
Fill each bottle with 2–3 cm of headspace. Cap tightly. Keep the bottles at room temperature for 10–14 days. Then chill 1 bottle for 24 hours and test it. A clean hiss is good.
A fountain is not.
Common beginner mistakes
Most failed home beers do not fail because the brewer used the wrong hop variety. They fail because the process was rushed. A simple beer made carefully usually tastes better than a complex beer made carelessly.
Avoid these mistakes:
- Using tools that were washed but not sanitized.
- Pitching yeast into hot wort.
- Fermenting near a radiator or sunny window.
- Opening the fermenter too often.
- Bottling before fermentation is complete.
- Adding too much sugar before bottling.
- Using weak bottles not designed for pressure.
- Changing too many recipe details at once.
- Judging the beer before it has conditioned.
After this list, the most useful habit is note-taking. Write down the yeast name, temperature, hop timing, bottling date, and tasting notes. If the beer tastes too sweet, fermentation may not have finished. If it tastes medicinal, water or sanitation may be the problem. If carbonation is weak, bottles may need more time or the sugar may not have mixed evenly. Small notes turn random brewing into controlled improvement, and that is how home brewing tips become real experience.
How long homemade beer needs before drinking
A simple pale ale is usually drinkable after 3–4 weeks from brew day. The timeline is practical: around 10–14 days for fermentation, 10–14 days for bottle carbonation, and at least 24 hours in the fridge before tasting.
Some bottles may taste better after another week.
That does not mean the recipe failed. Young beer can taste rough, yeasty, or slightly uneven. Time helps flavors settle. Carbonation becomes smoother, bitterness feels cleaner, and malt character becomes rounder.
Stronger beers need more patience. Porters, stouts, strong ales, and high-alcohol recipes may improve over 2–3 months. Wheat beers and hop-forward pale ales are better fresh, so do not age them too long. This beginner recipe sits in the middle: it benefits from short conditioning, but it does not need a cellar.
What to serve with homemade beer
A first homemade pale ale works well with salty, roasted, and lightly spicy food. The bitterness cuts through fat, while carbonation refreshes the palate. You do not need complicated pairings; simple snacks often work best.
Try these options:
- Roasted chicken with herbs.
- Grilled sausages.
- Salted pretzels.
- Cheddar or aged gouda.
- Crispy potatoes.
- Burgers.
- Spicy wings.
- Sushi rolls with cream cheese.
The last option may surprise some readers, but creamy and salty flavors can work nicely with a gentle pale ale. If you enjoy homemade kitchen experiments, the guide to Philadelphia sushi rolls gives a simple food idea for a relaxed tasting evening. Beer does not always need heavy bar food. Sometimes a clean, cold bottle and a well-made snack are enough.
How to make the second batch better
Repeat the same recipe once before changing it. That sounds conservative, but it is the fastest way to learn. If the first batch was clean but weak in aroma, adjust the late hops next time. If it was too bitter, reduce the early hop addition. If fermentation tasted rough, control temperature better.
Change 1 thing at a time.
A smart second-batch plan can look like this:
- Use the same malt extract.
- Use the same yeast.
- Improve cooling speed.
- Keep fermentation closer to 19–20°C.
- Add 2–3 g more hops in the final 5 minutes.
- Compare the taste with the first batch.
This method gives you useful information. If you change everything, you learn almost nothing. Brewing is not only creativity; it is memory, repetition, and small technical corrections.
The best home brewers are not the ones who add the most ingredients. They are the ones who understand what each change does.
And after the tasting? Keep the next kitchen project simple too. A cold homemade beer can pair surprisingly well with a light dessert, especially something creamy like protein ice cream if the beer is not too bitter.
FAQ
Is it legal to brew beer at home?
In many countries, home brewing for personal use is allowed, but laws differ. Some places limit volume or prohibit selling homemade alcohol. Check local rules before brewing.
How long does it take to brew beer at home?
A simple ale usually takes 3–4 weeks. Fermentation needs 10–14 days, bottle carbonation needs another 10–14 days, and chilling improves the first tasting.
Can I brew beer without special equipment?
You can start with basic tools, but a fermenter, airlock, thermometer, sanitizer, and proper bottles are strongly recommended. These items reduce infection and pressure risks.
Why does homemade beer taste sour?
Sour beer often means contamination. Dirty bottles, tubes, spoons, lids, or fermenters can introduce bacteria or wild yeast after the boil.
Can I add honey, fruit, or spices?
You can, but not in the first batch. Extra ingredients make fermentation less predictable and can increase infection risk. Learn the basic home beer recipe first.
What beer style is easiest for beginners?
A simple pale ale is one of the easiest styles. It ferments at room temperature, matures fairly quickly, and gives a clear balance of malt and hops.
Earlier we wrote about protein ice cream recipe: creamy homemade dessert with 30 grams of protein