How to make cheesecake at home becomes much easier when every stage is handled separately. The filling needs gentle mixing, while the crust benefits from brief baking before assembly. Temperature also matters because cold ingredients often leave lumps. Slow cooling protects the surface from deep cracks. This guide explains the full process, as noted by the customreceipt.com editorial team.
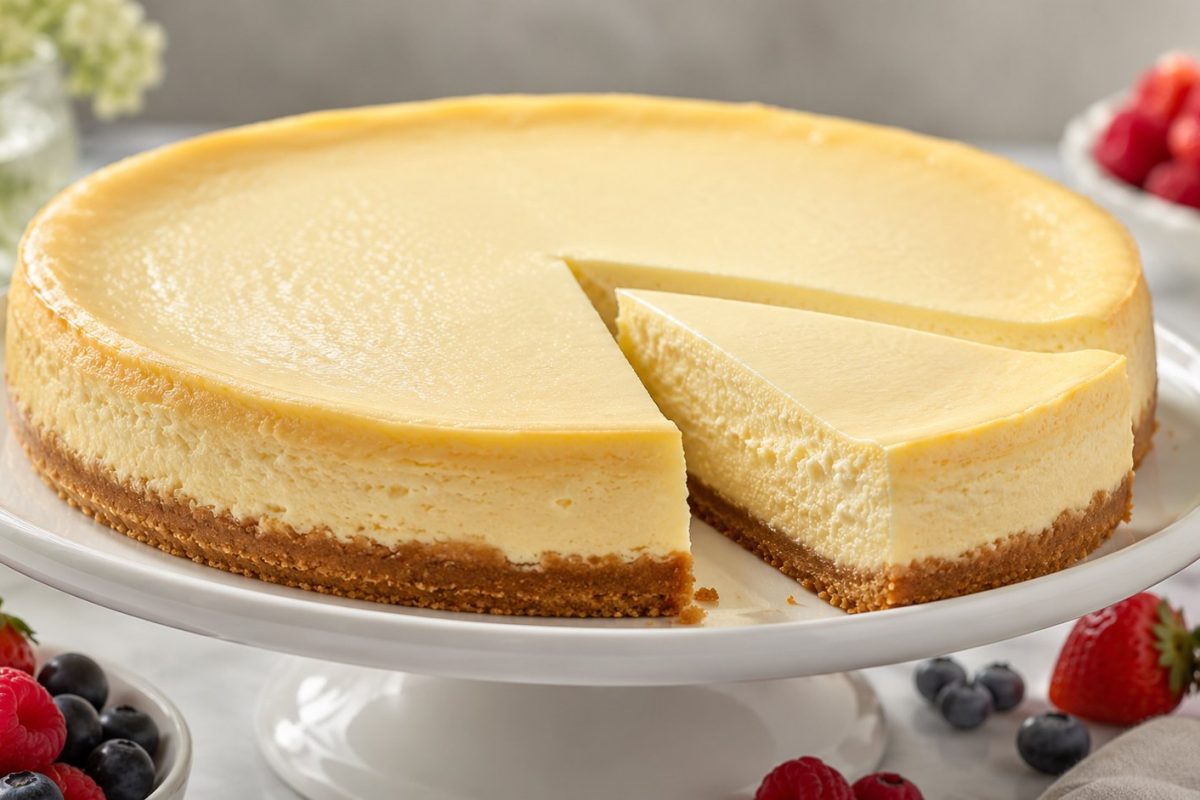
A classic cheesecake should feel rich without becoming heavy or rubbery. Its center remains creamy, while the crust adds a light buttery crunch.
The recipe does not demand professional pastry skills. However, accurate measurements and enough chilling time are essential. Rushing either stage can weaken the texture.
Good cheesecake depends less on decoration than on temperature, timing, and careful mixing.
What makes a classic cheesecake successful
A classic cheesecake recipe normally combines cream cheese, eggs, sugar, sour cream, and vanilla. Each ingredient performs a specific task. Cream cheese creates density, eggs hold the filling together, and sour cream adds softness.
The finished dessert should not resemble a dry cake. Its center remains smooth and slightly dense after chilling. New York-style cheesecake is usually richer than many European versions. It often contains more cream cheese and may include heavy cream. Lighter recipes can use yogurt, although this changes both flavor and structure.
The crust is also important. Graham crackers are traditional in many American recipes, while digestive biscuits offer a practical substitute. Both absorb butter well and create a stable base.
Those who prefer a chilled dessert with berries may also try this strawberry tiramisu recipe. It uses mascarpone, strawberries, and ladyfingers without a long baking process.
Ingredients for homemade cheesecake
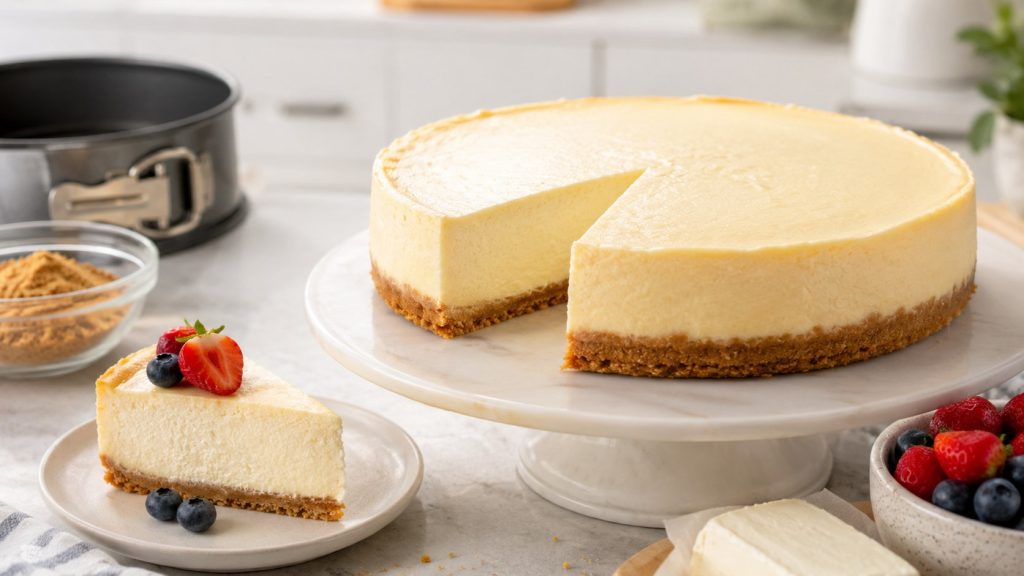
This recipe is designed for a 9-inch springform pan. It produces approximately 10 to 12 slices, depending on portion size.
Bring the cream cheese, sour cream, and eggs to room temperature before mixing. This small preparation step helps the ingredients combine without excessive beating.
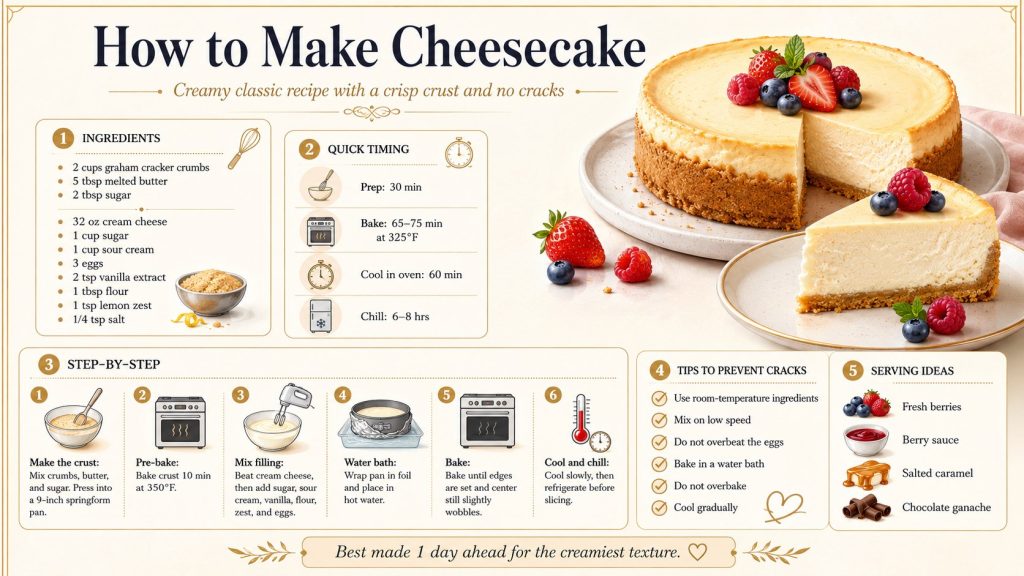
You will need:
- 2 cups graham cracker crumbs
- 5 tablespoons unsalted butter, melted
- 2 tablespoons granulated sugar
- 32 ounces full-fat cream cheese
- 1 cup granulated sugar
- 1 cup full-fat sour cream
- 3 large eggs
- 2 teaspoons vanilla extract
- 1 tablespoon all-purpose flour
- 1 teaspoon finely grated lemon zest
- ¼ teaspoon salt
Full-fat brick-style cream cheese gives the most predictable result. Spreadable cream cheese contains additional moisture and may create a softer filling.
Sour cream balances the sweetness and prevents the dessert from tasting flat. Greek yogurt can replace it in the same quantity, but the cheesecake will become slightly tangier.
Only 1 tablespoon of flour is required. It supports the egg structure without turning the filling into a regular sponge cake. Lemon zest is optional, yet it adds freshness. Use only the colored outer layer because the white pith tastes bitter.
After measuring the ingredients, keep them close to the mixing bowl. This prevents pauses and hurried adjustments once the eggs have been added.
Equipment that helps avoid common mistakes
Specialized pastry equipment is not essential. A few reliable kitchen tools are enough for a smooth filling and stable crust.
Prepare the following items:
- A 9-inch springform pan
- A large mixing bowl
- An electric hand mixer or stand mixer
- A silicone spatula
- Heavy-duty aluminum foil
- A deep roasting pan
- An oven thermometer
- A sharp knife for serving
A springform pan allows the sides to be removed without turning the dessert over. Before adding the crust, check that the base is locked firmly.
Use the mixer at low speed. High speed fills the batter with air, which later expands in the oven and collapses during cooling.
The spatula is useful between mixing stages. Scraping the bottom and sides prevents hidden pieces of cream cheese from remaining in the batter. Heavy foil protects the pan during a water bath. Two or 3 wide layers are safer than several narrow pieces with exposed seams.
An oven thermometer is also helpful. Domestic ovens may run hotter or cooler than the selected setting, and cheesecake reacts strongly to unstable heat.
Preparation and baking schedule
Cheesecake requires little active work, but it needs several hours of cooling. The following schedule helps plan the dessert for a dinner or weekend meal.
| Stage | Temperature or condition | Approximate time |
|---|---|---|
| Preparing the crust | 350°F | 15 minutes |
| Mixing the filling | Room temperature | 15 minutes |
| Baking | 325°F | 65–75 minutes |
| Cooling in the oven | Door slightly open | 60 minutes |
| Cooling on the counter | Room temperature | 60 minutes |
| Refrigerating | Covered after cooling | 6–8 hours |
| Total process | Including chilling | 9–11 hours |
Most of the total time is passive. The dessert remains in the oven, on the counter, or in the refrigerator without additional work.
Do not reduce the chilling period to save time. Warm cheesecake may look set around the edges but remain unstable inside.
An overnight rest often produces the best texture. It also makes slicing easier and allows the vanilla and cream cheese flavors to settle.
Avoid covering a warm cheesecake tightly. Steam will condense under the cover and leave droplets on the surface.
For an evening meal, bake the dessert the previous day. This removes pressure and leaves enough time for decorating before serving.
How to make the graham cracker crust
Preheat the oven to 350°F. Lightly grease the springform pan and place a circle of parchment paper on the bottom. Combine the graham cracker crumbs with melted butter and 2 tablespoons of sugar. Stir until the mixture looks evenly moistened.
The texture should resemble wet sand. When squeezed in the hand, the crumbs should briefly hold their shape. Pour the mixture into the pan and spread it evenly. Press it down with the flat base of a glass, but do not compress it too aggressively.
Bake the crust for 10 minutes. Remove it from the oven and let it cool while preparing the filling.
Reduce the oven temperature to 325°F before baking the assembled cheesecake.
Pre-baking creates a firmer base. Without this step, the crust may absorb moisture from the filling and become soft.
Bakers interested in understanding crust development can also read this homemade bread baking guide. The principles of controlled heat and moisture apply to many baked recipes.
How to prepare a smooth cheesecake filling
Place the softened cream cheese in a large bowl. Mix it on low speed until no visible lumps remain.
Stop the mixer and scrape the bowl. Dense pieces often hide near the bottom and can remain there until baking.
Add the sugar, flour, and salt. Continue mixing slowly until the dry ingredients disappear into the cream cheese.
Next, add the sour cream, vanilla, and lemon zest. Mix only until the filling looks smooth and glossy.
The eggs must be added 1 at a time. After each egg, mix only until the yellow streaks are no longer visible.
Do not beat the batter after adding the final egg. Overmixing creates bubbles that can rise and split the surface.
Pour the filling onto the cooled crust. Tap the pan gently on the counter 2 or 3 times.
Large air pockets should rise to the top. Break visible bubbles with the tip of a clean knife or toothpick.
Smooth the surface with a spatula. Small marks usually disappear as the filling heats.
How to bake cheesecake in a water bath
Wrap the base and sides of the springform pan with 2 or 3 layers of heavy foil. The foil should reach well above the water level.
Place the wrapped pan inside a deep roasting pan. Move both pans onto the middle oven rack before adding water.
Pour hot water into the roasting pan carefully. It should rise about 1 inch around the springform pan.
Do not pour water directly near the foil seams. Even a small opening can allow moisture to enter the crust.
Bake the cheesecake for 65 to 75 minutes. Avoid opening the oven during the first hour because sudden temperature changes affect the surface.
The edges should look firm when the dessert is ready. The center should still wobble slightly when the pan is moved.
A completely rigid center often means the cheesecake has baked too long.
Turn off the oven and leave the dessert inside. Open the door several inches and allow the temperature to fall gradually for 60 minutes.
This slow transition protects the filling from shrinking rapidly. It also keeps the center creamy rather than dry.
How to prevent cracks on cheesecake
Cracks are usually caused by a combination of excess air, high heat, and sudden cooling. They do not always mean the recipe has failed.
The following precautions reduce the risk:
- Use room-temperature dairy products and eggs.
- Mix the batter only on low speed.
- Add the eggs near the end.
- Do not open the oven unnecessarily.
- Stop baking while the center still moves.
- Cool the dessert inside the turned-off oven.
- Chill it completely before removing the pan.
Room-temperature ingredients blend quickly. Cold cream cheese requires longer mixing, which introduces more air into the batter.
Eggs also trap air when beaten aggressively. Their purpose is to provide structure, not to make the filling fluffy.
The water bath limits direct heat around the sides. It also creates humidity, preventing the outer layer from drying too early.
Do not insert a knife into the center to test readiness. The cut can develop into a wider crack as the filling cools.
If the surface still cracks, the dessert remains safe and usable. Fresh berries, ganache, caramel, or a thin sour cream topping can cover the mark.
The texture matters more than a perfectly flat top. A creamy center is preferable to an attractive but overbaked cheesecake.
Cooling the cheesecake correctly
After 60 minutes in the switched-off oven, remove the roasting pan carefully. Lift out the cheesecake and take off the foil.
Place the springform pan on a cooling rack.
Run a thin knife around the inner edge. This releases the filling from the sides before it begins to contract.
Let the dessert stand at room temperature for about 60 minutes. It should no longer feel hot before refrigeration.
Placing a warm cheesecake in the refrigerator creates condensation. The rapid temperature change may also damage the surface.
Once cooled, cover the pan loosely and refrigerate it for at least 6 hours.
Overnight chilling is ideal. The filling becomes firmer, the flavors deepen, and the crust holds together more effectively.
Remove the springform ring only when the dessert is fully cold. If part of the edge sticks, loosen it with a warm knife instead of pulling.
For clean portions, dip a sharp knife into hot water. Dry the blade before every cut.
Toppings and serving ideas
Cheesecake can be served plain, but a carefully chosen topping adds acidity, color, or texture. The topping should complement the filling rather than hide it.
Fresh strawberries are a reliable option. Raspberries, blueberries, and cherries also balance the rich cream cheese flavor.
Wash the fruit in advance and dry it completely. Excess water can collect on the cheesecake surface.
A quick berry sauce can be prepared with fruit, sugar, and a little lemon juice. Simmer the mixture until it thickens lightly, then cool it before serving.
Salted caramel works well for an autumn or winter dessert. Use a thin drizzle because too much sauce can make each slice overly sweet.
Chocolate ganache creates a richer version. Pour warm heavy cream over chopped dark chocolate, stir until smooth, and cool before spreading.
Toasted nuts add contrast. Pecans, almonds, and hazelnuts are especially suitable with caramel or chocolate.
Serve sauces separately when guests have different preferences. This method also keeps leftover cheesecake easier to store.
A colder variation can be inspired by this homemade protein ice cream recipe. It includes ideas for combining cream cheese with berries in a frozen dessert.
Common mistakes when making cheesecake
The first common mistake is using cold cream cheese. It forms lumps that become difficult to remove after sugar and eggs are added.
Mixing at high speed creates another problem. The batter may look lighter, but the trapped air can produce a sunken center.
Overbaking changes the filling from creamy to grainy. Remove the cheesecake while a small area in the center still moves gently.
Sudden cooling can also cause damage. Taking the dessert directly from a hot oven into a cold room encourages rapid contraction.
An unstable water bath may soak the crust. Check the foil carefully and avoid using sheets with tears.
Some bakers also cut cheesecake too early. A warm filling sticks to the knife and loses its shape.
Allowing the dessert to chill overnight solves many serving problems. The texture becomes more stable, and the slices look cleaner.
How to store and freeze cheesecake
Keep cheesecake refrigerated in a covered container. It remains at its best for up to 4 days.
Do not leave it on the table for several hours. The filling contains dairy products and eggs, so prolonged warmth affects both safety and texture.
To freeze the dessert, first chill it completely. Cut it into portions before freezing if only a few slices will be needed later.
Place the slices on a tray and freeze them uncovered until firm. Then wrap each portion in plastic wrap and foil.
A freezer-safe container offers additional protection from odors and freezer burn.
For the best quality, use frozen cheesecake within 1 month. It may remain safe longer, but the texture gradually becomes less creamy.
Thaw the slices overnight in the refrigerator. Avoid using a microwave because uneven heating can soften the edges while leaving the center frozen.
Fresh fruit should be added after thawing. Berries release moisture during freezing and may stain the surface.
FAQ
Can cheesecake be made without a water bath?
Yes, but the edges may cook faster than the center. Place a separate pan of hot water on the lower oven rack to increase humidity. The result may still develop light browning around the sides.
Why is the filling lumpy?
The cream cheese was probably too cold. Let it soften before mixing and beat it alone first. Do not try to remove lumps by mixing the completed batter at high speed.
How can I tell when cheesecake is ready?
The outer area should appear set. A small circle in the center should wobble slightly. It will continue firming as the dessert cools.
Can sour cream be replaced?
Full-fat Greek yogurt is the easiest substitute. Use the same amount. The flavor will become slightly sharper, and the texture may feel lighter.
Why did water get into the crust?
The foil probably had an opening or tear. Use several wide sheets and press them closely around the base. A heat-resistant roasting bag can offer another layer of protection.
Can cheesecake be prepared in advance?
Yes. Cheesecake is often better after resting overnight. Bake it 1 day before serving and add fresh toppings shortly before presentation.
Which cream cheese is best?
Use full-fat brick-style cream cheese. Avoid whipped products and soft spreads sold in tubs. Their higher moisture content may prevent the filling from setting properly.
Can cheesecake be frozen whole?
Yes, a plain cheesecake can be frozen whole. Chill it first, wrap it carefully, and place it in a rigid container. Thaw it slowly in the refrigerator before decorating.
Erlier we wrote about Strawberry tiramisu recipe: how to make the viral no-bake dessert at home